
[ad_1]
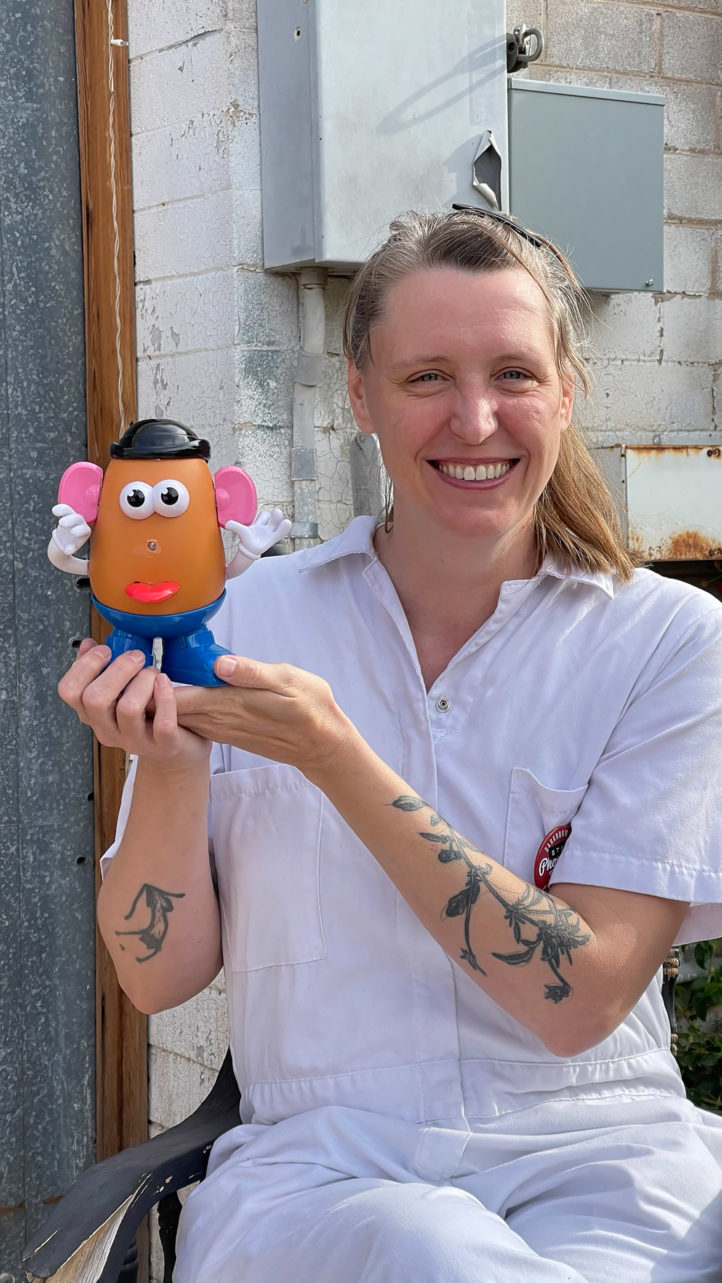
“I got to thinking about the common saying, ‘That looks like it was taken with a potato,’” says experienced cyanotype photographer Stacy Piotti, about the origins of this project. She began experimenting with pinhole photography after receiving one as a gift a few years ago. After a handful of DIY pinhole camera experiments, she decided to give Mr. Potato Head a go at being transformed into a one-of-a-kind camera.
You can view this article and much more with minimal ads in our brand new app for iOS, iPadOS, and Android.
I marvel at photographers who step beyond conventional boundaries to create incredibly unique images. Pinhole photography is one such genre I haven’t attempted yet. The effort it takes to make these kinds of images is admirable. But creating unconventional photos isn’t new to Stacy Piotti. She considers herself an old-school photographer who enjoys taking cyanotype images of her surroundings in Phoenix, Arizona. It’s all about enjoying the process of photography for her, and with this in mind, she decided to transform a Mr. Potato Head into a pinhole camera.
The Essential Photo Gear Used by Stacy Piotti
Stacy told us:
- Panasonic Lumix DMC-LX5
- Kodak Brownie Hawkeye
- Brownie Bullseye
- Kodak Anastigmat Accordion No. 0
- Kodak Hawkeye Accordion Model B
- Rolleicord IV TLR
- Kodak Autographic Accordion No. 3 model C
- Canon AE-1
- Fujifilm X100T
- Kodak Stereo Camera f3.5
- Wardette
- Polaroid Now
- Fuji Instax Mini 90
- Various DIY pinhole cameras
I’ve become obsessed with collecting older film cameras. It’s fun to play around with a little bit of everything that once was available. From rare rangefinders, to the common Kodak Brownie box cameras, what’s old has become new. I have a collection of cameras that are in regular rotation, competing as my daily shooters
The Phoblographer: Please tell us about yourself and how you got into photography.
Stacy Piotti: A native to the East coast, I spent my youth in Pennsylvania and adulthood living in Maryland, New York, and New Jersey. After finding a new work opportunity in 2016, I chose to pick up and move west to Phoenix, Arizona. Taking up residence in the valley of the Sun, I found it much easier to create cyanotypes, and the volume at which I produced increased. My passion for alternative processes and film photography led me to connect with others who also shoot and create in Arizona. I was told to check out Phoenix Film Revival, a community darkroom in Downtown Phoenix that is working to keep film alive by providing access to resources and connecting film photographers. I decided to check it out and signed up for a film processing workshop only to find myself coming back frequently for open lab hours. I now teach workshops and educate those on the art of cyanotypes and alternative processes at PFR.
I’ve always enjoyed photography, having owned my fair share of plastic point-and-shoot cameras when I was a kid, taking pictures of anything I set my eyes on. It wasn’t until 2012, when I bought a digital Lumix DMC-LX5, that I started to pay attention to what I was shooting. I began to shoot with intent and focus more on the subject. That camera was and still is a little wonder, so portable, allowing me to take it anywhere. As fun as taking photos were, something was missing after the image was saved to my computer. I started to learn more about alternative process and film photography. It’s such a physical form, lending itself well to experimentation. The options are endless, allowing you to try out so many different techniques, cameras, films, and processing methods.
The Phoblographer: You’ve got a really deep interest in cyanotype photography. Tell us a bit about this please.
Stacy Piotti: About 15 years ago, I was going through a pile of books when I came across Better Homes and Gardens, a book I constantly leafed through as a child. There was a section in the book that I would always get stuck on, a photo of a couch filled with cyanotype portraits printed on pillows. At the time, I didn’t understand what a cyanotype was but found this image fascinating. The memories sparked the urge to learn more, and I immediately went online, researching the chemicals and the Cyanotype process. I was hooked instantly and began my journey into creating my own.
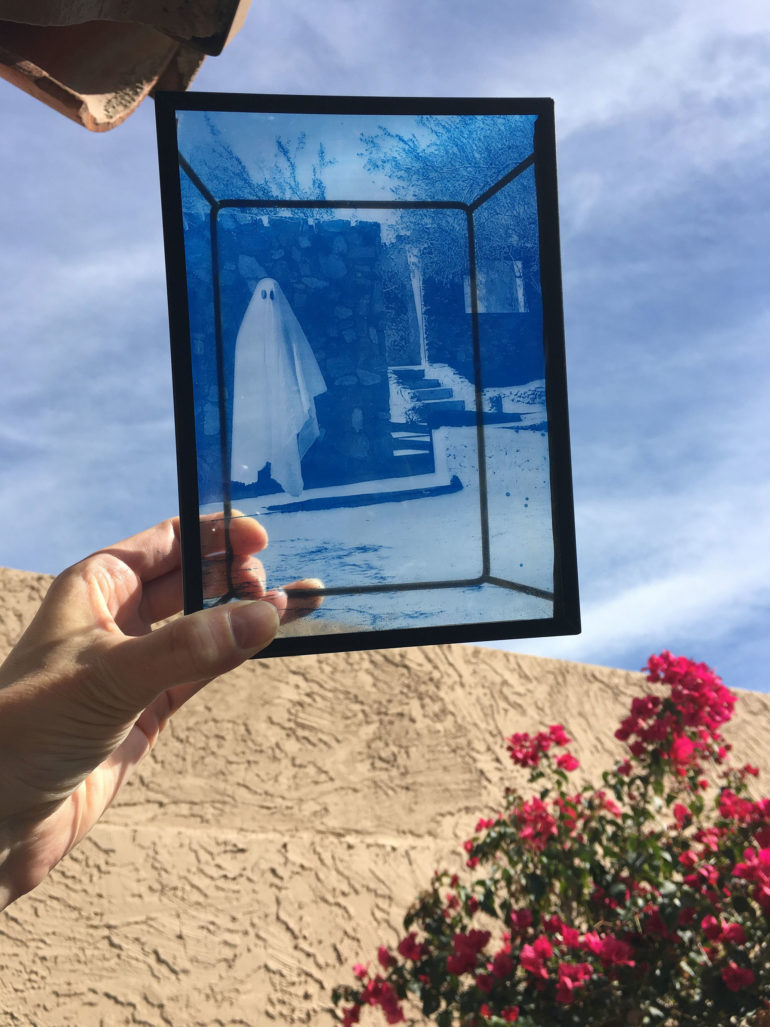
I love creating new narratives with cyanotypes, a fantastic mix where the old world meets modern. It’s a simple process that can be unpredictable at times while also being flexible. Cyanotypes can be created on a variety of materials allowing them to be watercolor tinted, gilded, ink embroidered, and or toned. I use digital negatives to create cyanotypes and objects to create photograms while occasionally combining the two styles. I can reconceive my photography through this medium and rewrite the stories the photos once told. The only drawback to this medium is that my work has started to get bigger and bigger. When I started, I made many smaller prints. Now I find myself making some photograms as large as four feet by eight feet. I currently have a storage room filled with work I have created over the years.
The Phoblographer: How did the idea for this project come about? What factors were considered to decide which toy would be modified for this project?
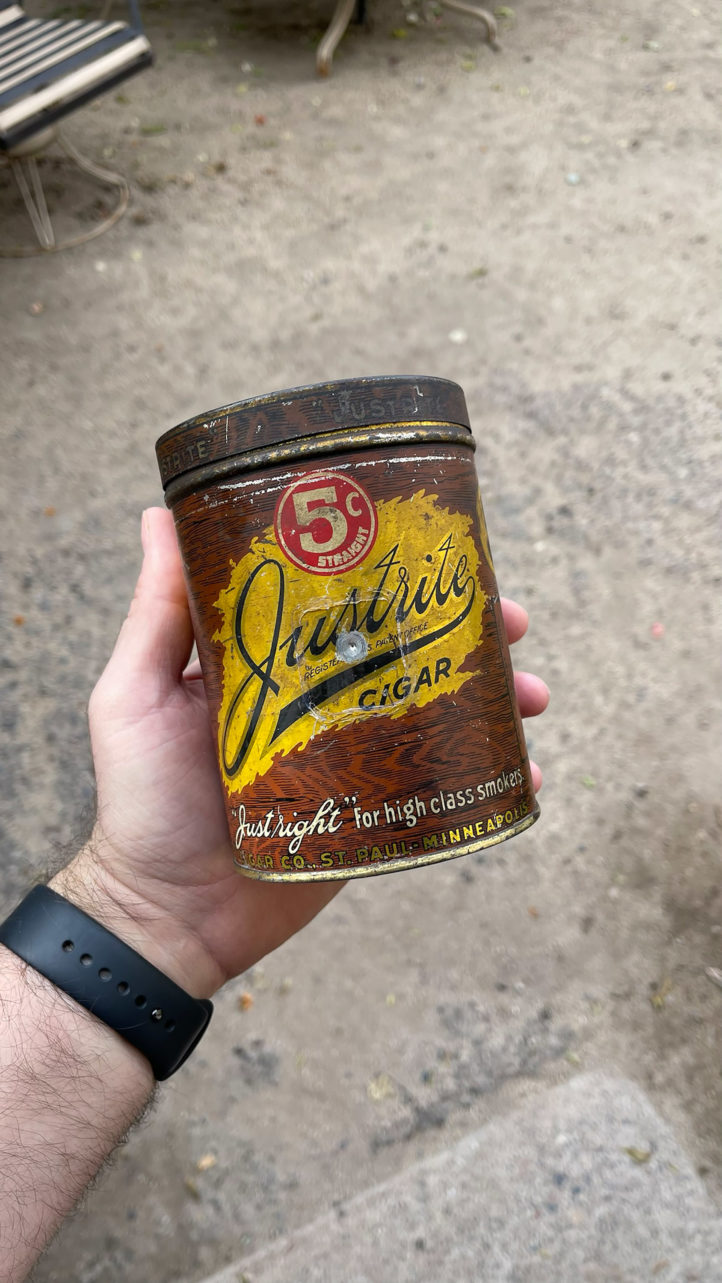
Stacy Piotti: A couple years ago, I received an Ilford Obscura Pinhole camera as a gift and started to experiment with direct positive paper. I loved how moody the shots were and how a normal subject could be transformed into something completely different and dreamlike when taken through a pinhole. Decided to give it a go and make my own pinhole camera; I found an old cigar can and used Ilford RC photo paper as the film, lending to its own unique style. I started brainstorming, thinking about what else I could use to create a pinhole camera. Anything that can be made light-tight could be fashioned into a pinhole camera. A common assumption is that the more expensive the camera, the better the photo it will create. This is far from the truth. I often get fascinating images from the most rudimentary and inexpensive cameras.
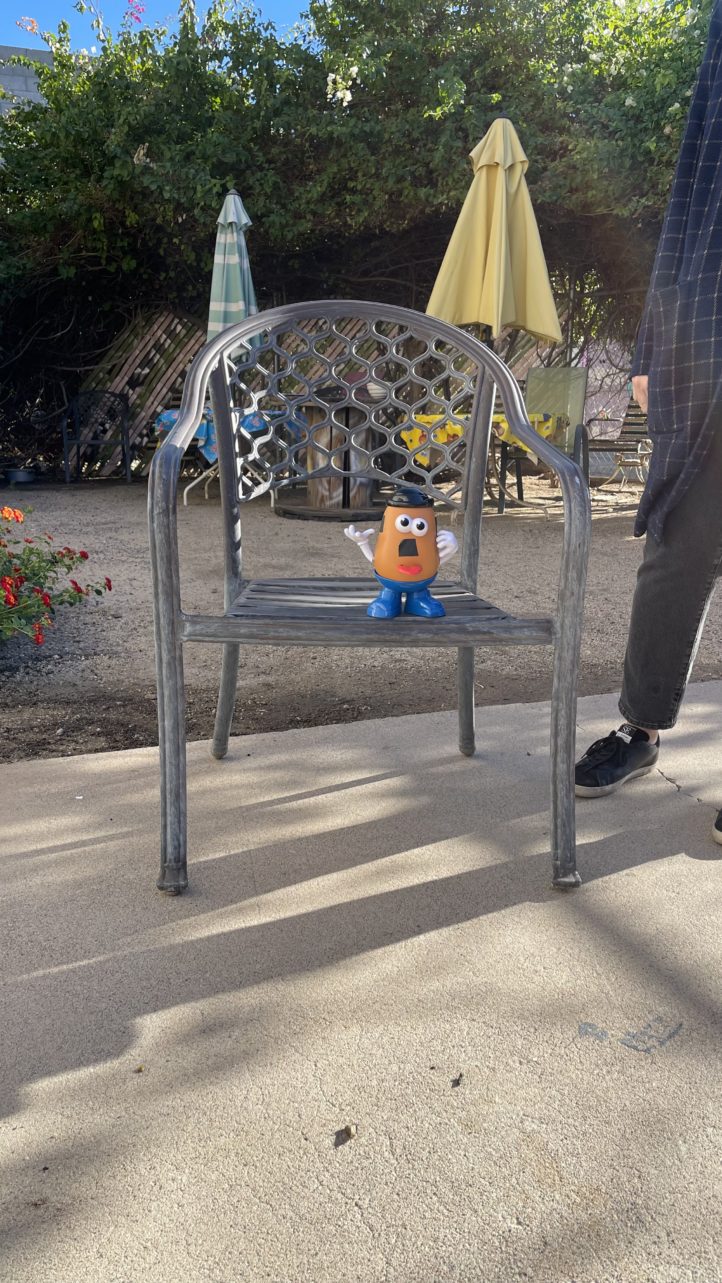
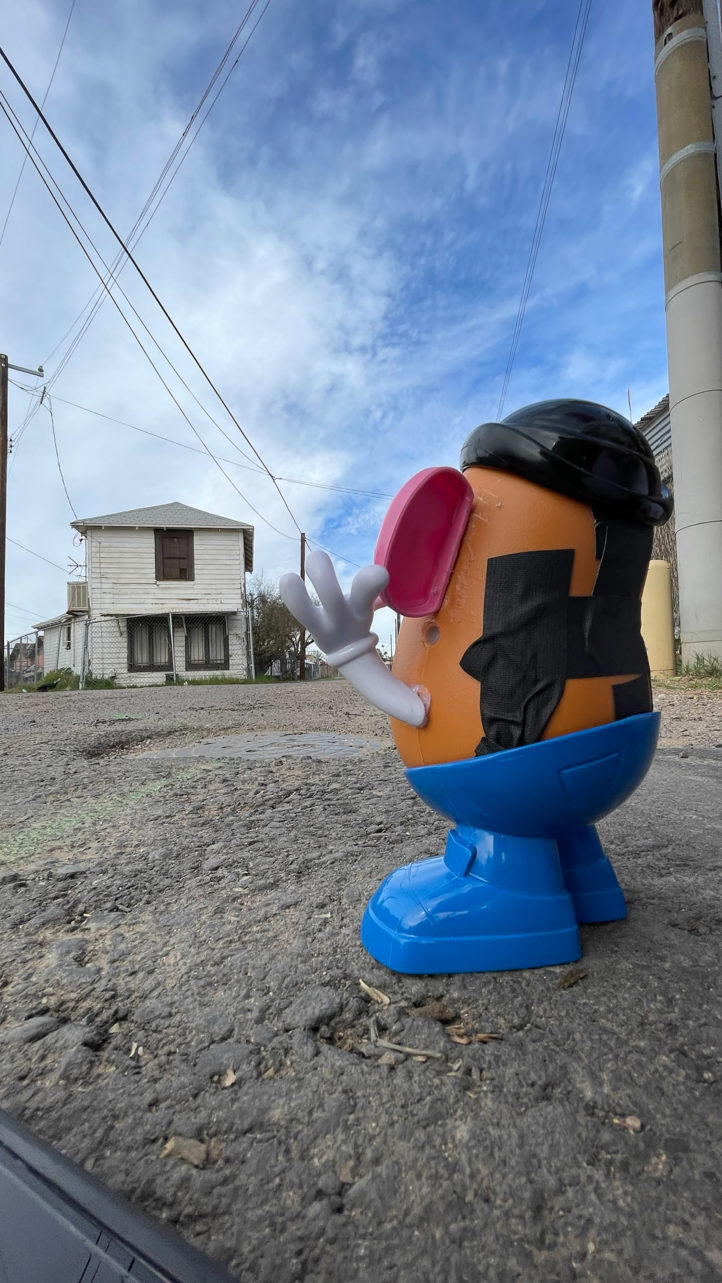
I got to thinking about the common saying, “That looks like it was taken with a potato.”, referring to how low the quality of a photo is, so I decided to take some photos with an actual potato to see how it would turn out. I carved out an actual, real potato and turned it into a pinhole camera. It didn’t work out as well as I was hoping, but with a bit of finagling, I’m sure I could get it to work. Before I started diving into perfecting a real potato pinhole camera, I realized it would be much more fun to use a Mr. Potato Head since he’s cuter and will last a heck of a lot longer than a real potato.
The Phoblographer: Isn’t pinhole photography too unpredictable to be doing now when film is becoming more and more expensive?
Stacy Piotti: Yes, film is getting more expensive, but I save money by processing my own film myself. It’s 5 to 10 times more expensive to send the film out to be developed versus home development. I also scan everything myself, which is a huge saving as well. For my pinhole photography, I use Ilford Resin Coated MGIV silver gelatin paper that I cut down to fit the camera in use. The paper is approximately $1 per 8″ x10″ sheet, and I usually get about eight shots from a sheet depending on the pinhole camera. For the direct positive paper, I use the Ilford Harman 4×5 sheets, which run approximately a dollar per 4″ x5″ sheet, which is a bit pricier. Yes, pinhole photography can be unpredictable, but so is most of my photography and art, for that matter. Hobbies will always come at a cost, though; shooting on a $5 Mr.Potato Head is a real bargain!
The Phoblographer: How did you modify Mr. Potato Head to take pictures. Please explain how this helped to achieve your creative vision for the images you hoped to produce.
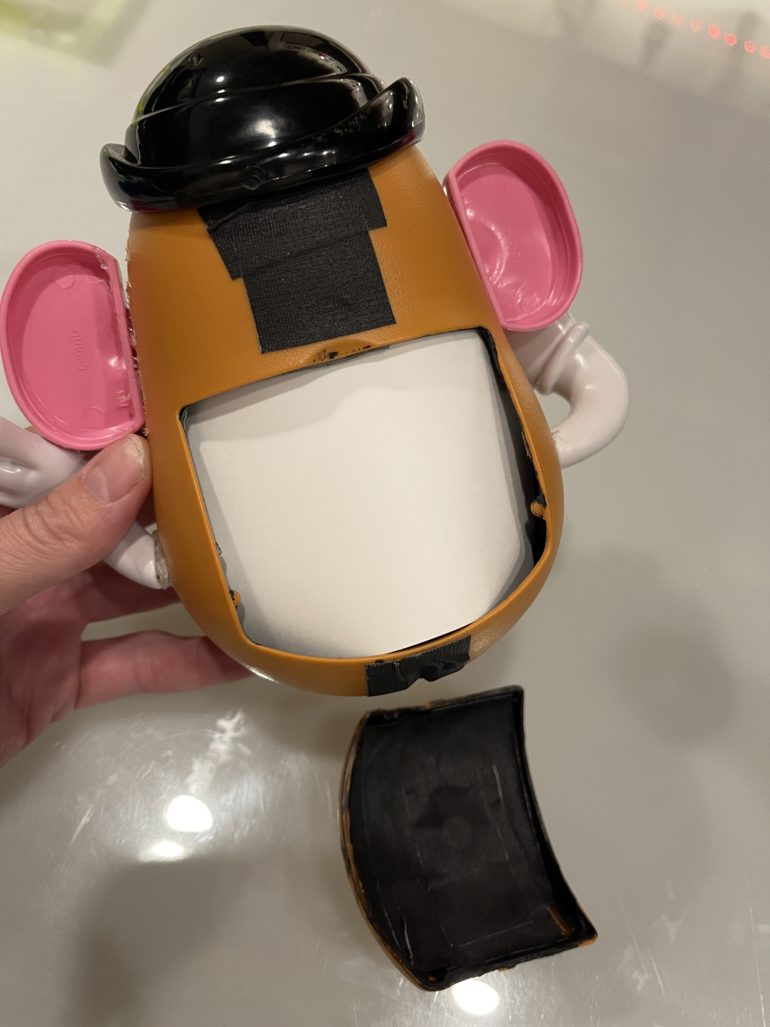
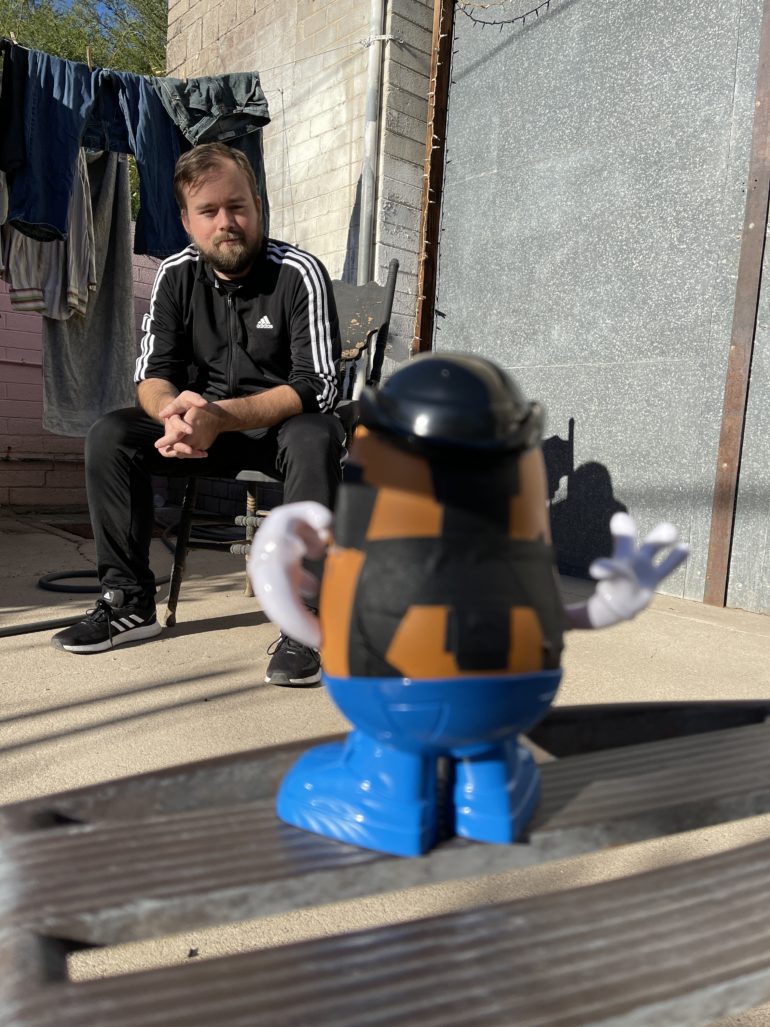
Stacy Piotti: My main goal was to get Mr. Potato Head to take a photo; it was as simple as that. Anything that resulted in the slightest latent image created with the plastic doll would be considered a win. The biggest hurdle was that he had so many holes in him because of his removable accessories. Knowing this would be an issue, I made sure the accessories were all hot glued into his body, and the entirety of the inside was covered in black gaffers tape to make him as light tight as possible. Any of the holes that were exposed and didn’t have an accessory in them I filled with hot glue.
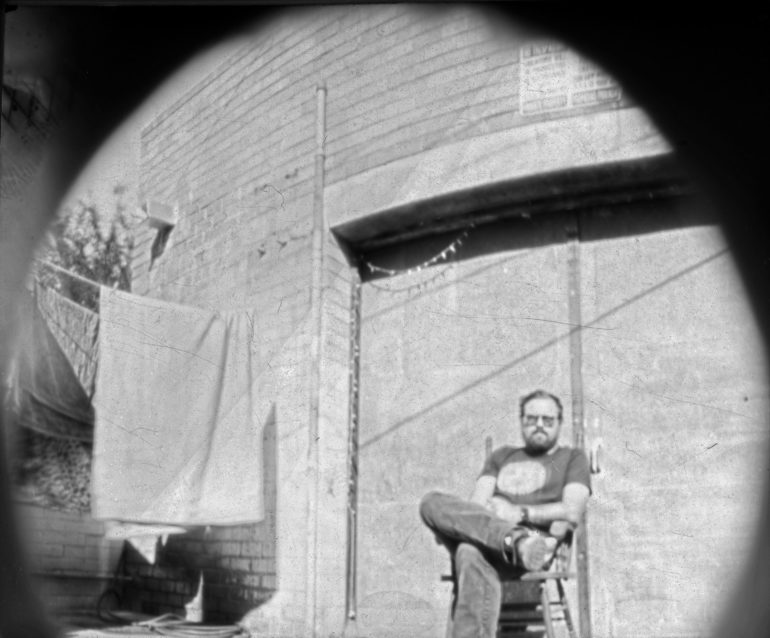
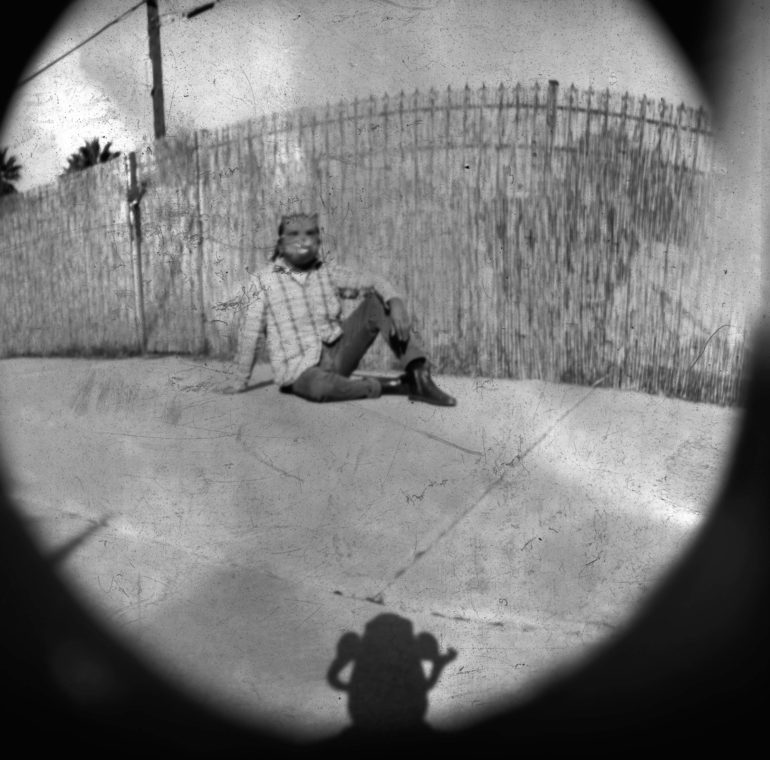
The nose was left off to create a foundation for the pinhole. I used an aluminum can to cut out a tiny plate for the pinhole, then used the smallest pin in my sewing kit to poke a hole in the plate. After that, I gaffer-taped it to the inside of the nose hole. Then I cut down Ilford resin-coated silver gelatin paper to about 3″ x 4″ and inserted it into the back door under safe light. I have a piece of gaffers tape on the outside that I take off when I take the image. The negatives are developed in Dektol then stopped and fixed. Negatives are scanned and inverted to create the final image. The process yields roughly a 3″ diameter image.
The Phoblographer: You’re someone who’s an expert with pinhole photography. For the sake of our readers, please tell us how you calculated appropriate exposure values for this camera.
Stacy Piotti: I wouldn’t call myself an expert by any means. However, with lots of trial and error, I have found the sweet spots that usually yield the results I am looking for. I don’t typically make any calculations to get certain results; instead, I make a rough guess based on experience and give it a go. Since I don’t use a pre-cut pinhole, I experimented a bit. Generally, if the distance between the pinhole and the paper is less than 5 inches or so, I’ll make the hole about the size of a sewing needle pin. If the distance is over 5 inches, the hole can be larger.
In the direct sun, I’m looking at around 20-30 second exposure time. In cloudy conditions, it’s closer to 45-60 seconds.
The Phoblographer: What were your observations after the first round of photos? Were there any modifications done to the camera after this?
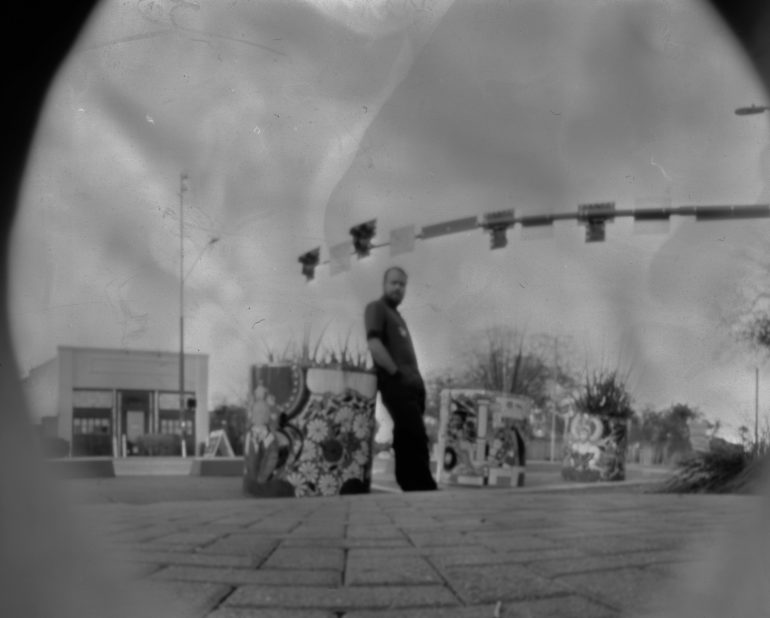
Stacy Piotti: In the first few shots, I didn’t seal the back door seams, which let in an excessive amount of light and fogged the paper. I corrected this easily by using gaffers tape to completely cover the seams. The images were also blurry, which meant the hole in the pinhole was too big. I recut the aluminum and made a smaller pinhole. While this improved the blur, the images still aren’t perfectly in focus. This is to be expected with pinhole cameras since there is no lens.
The Phoblographer: It must have been really exciting to develop these frames. Were you confident that the results would turn out well?
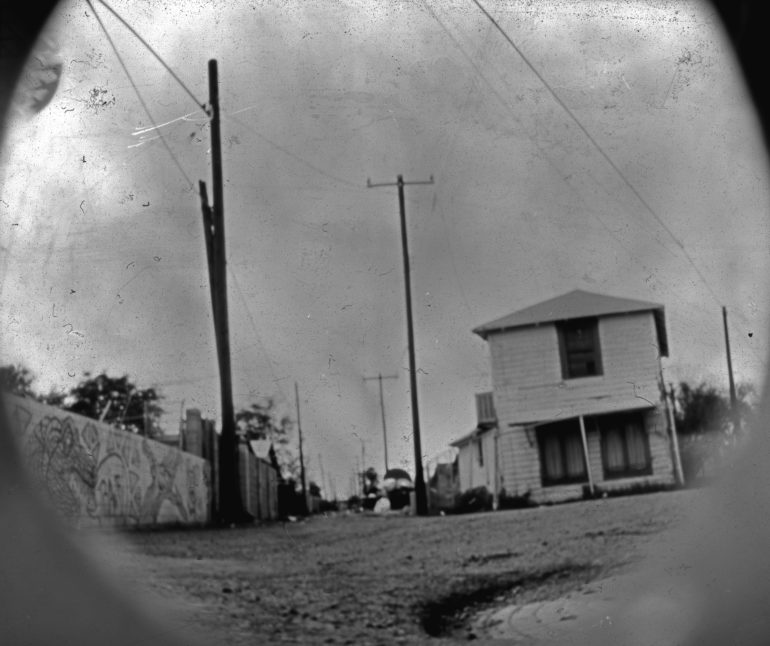
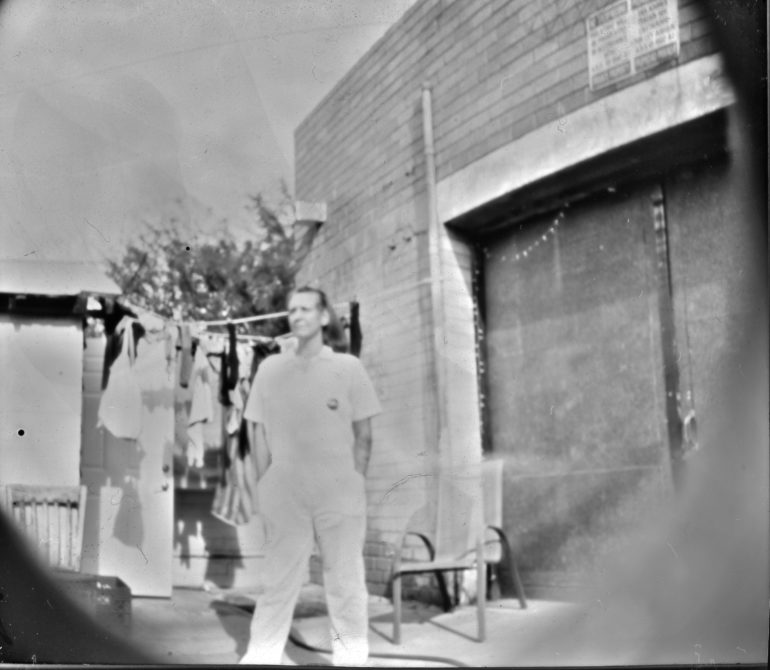
Stacy Piotti: Based on previous experience with pinhole cameras, I was confident that I would get an image since I would only need to do a few modifications to get a light-tight space for the pinhole. It was exciting to see the first images come out because I wasn’t sure what to expect for quality. There is something very strange yet wonderful about seeing the world from Mr. Potato Head’s point of view.
The Phoblographer: This could actually be a great idea to get children interested in photography – toys modified into pinhole cameras. Is a collab with Hasbro something you’d consider?
Stacy Piotti: Getting children involved with pinhole photography is a great opportunity to demonstrate the fundamentals of how photography works. Creating pinhole cameras from characters that children are familiar with would be a fun way to encourage their curiosity. I personally wouldn’t want to pursue a collaboration with Hasbro, but it would be great to see themed, re-usable cameras more ready marketed to the youth. What a great way to make photography fun!
The Phoblographer: I’m guessing this is the first one you’ve played around with, but it’s probably far from being the last of such cameras you’d make. What, if any, figures are you considering for future pinhole cameras?
Stacy Piotti: I’ve made a pinhole camera from an old cigar can that takes some enjoyable photos. I want to continue making pinhole cameras from a variety of objects. Anything that you can make light-tight can be turned into a pinhole camera. I plan to revisit the actual potato camera just for the heck of it.
For the Mr. Potato Head pinhole, I found a 120 roll of the film to fit perfectly between his two arms, allowing you to turn one of the arms to advance the film. There may be some potential to fabricate a 3d printed insert for Mr. Potato Head, creating a smooth action for him for function as an actual film camera.
All images by Stacy Piotti. Used with permission. Please visit her website and Instagram to see more of her photos.
Want to get your work featured? Here’s how to do it!
[ad_2]


