

Whenever a student asks, “What should I work on before class?” my standard answer is “Nothing.” After all, students are coming to class to learn (presumably), and one of the benefits of a class is learning how to practice perfectly rather than replicating “improper” whatever (stance, chisel use, sharpening, etc.). But if pressed, I’ll tell folks to practice sawing to a line – a key skill for most hand tool woodworking, and certainly for my classes, almost all of which involve dovetails. The better one is at sawing to a line, the better those dovetails will be. (I know some people champion sawing, then paring for a perfect dovetail fit; I am not one of them.)
So to practice, chuck a piece of wood (preferably pine or poplar – something inexpensive and not too hard) in a face vise, leg vise, or twin-screw vise, so the top of the board is close to level with the bottom of your elbow. That puts it at the best height for comfortable sawing; the more comfortable you are, the better your cuts will be … as long as the work is fully supported. (And that’s why I like a twin-screw vise atop my bench for dovetailing. I can easily secure the wood at a comfortable height, and have it be fully supported. If it’s too high above the vise, there will be lots of vibration, which will make it harder to saw.)
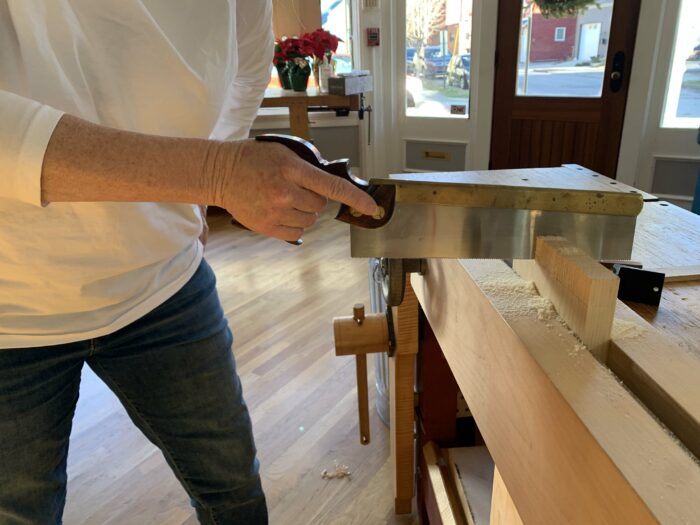
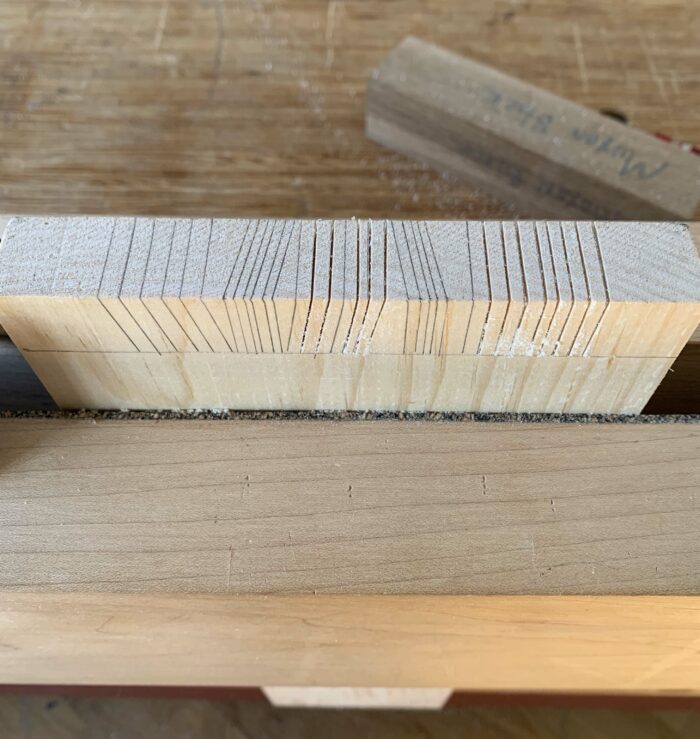
Use a square/dovetail marker/sliding bevel/etc. to mark a series of lines across the top and down the face, preferably in all the orientations you’d be using for dovetails – so some at 90° across the top and at an angle down the front, in both directions (tails), and some at an angle across the top and straight down the front (pins)…and some at 90° across the top and straight down the front (just because it can’t hurt to practice that cut, too).
Getting the cut started is one of the more difficult things for beginners, and it’s usually because they’re gripping the saw too hard and/or pushing down too hard (I use a Western-style saw; the rules for pullsaws are different). Grip the saw lightly with your middle through pinky fingers; your index finger should be pointing in the direction of the saw’s spine. Hold the saw as if it is an uncooked egg or baby bird – in other words, just hard enough that it can’t escape, but not enough to crush it. (If your hand starts to hurt in a long session of sawing, you’re likely gripping too hard.)
Start with the 90° cuts – they’re the easiest.
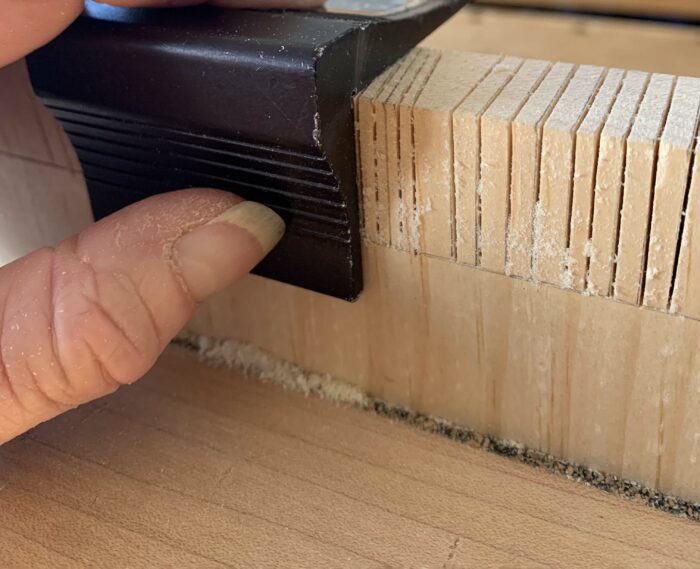
With your off hand, pinch the board just next to the line you’re planning to cut, and rest the side of the tip of the saw plate (the toe) against your fingers. Squeeze those fingers together and the plate will move to the right (if you’re right-handed); loosen your pinched fingers and it will move left. Your fingers
are a micro-adjustable alignment jig. Then sort of hover right over the cut at either the front or back corner with the saw plate, and lightly push forward – not down — with the side of the plate still resting against the side of your fingers (which have adjusted the plate to the perfect location).
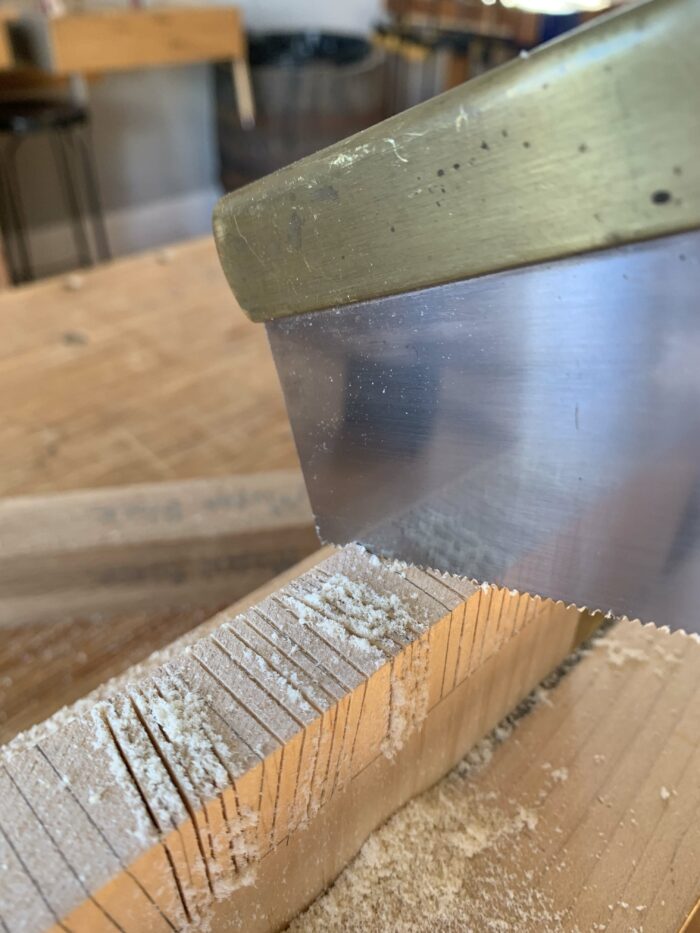
I usually start with the saw tipped down and start the cut at the back. Yes, that can break out the back of the board a little, but in actual work, the inside of the work is always facing away from me in the vise, so a little tear-out won’t show (and anyway, it rarely happens in pine … which, because I build a lot of tool chests, feels like all I use). You can also start at the front corner, with the saw tipped up. That will obviate the possibility of tear-out, but I find students have more trouble with it. You do you. But what is important is that you start on the corner, not try to start with the saw level across the wood. It’s a lot harder to start, say 12 teeth in a cut than three.
As you push forward (still not down!), drop the saw plate down a bit onto the line, then all the way onto the line (still moving forward).

Once the saw is fully in the cut across your line, you can exert a little downward pressure – not too much though – to make the cut go faster. If you push down too hard, the cut will be more difficult. (I know this sounds antithetical; it isn’t.)
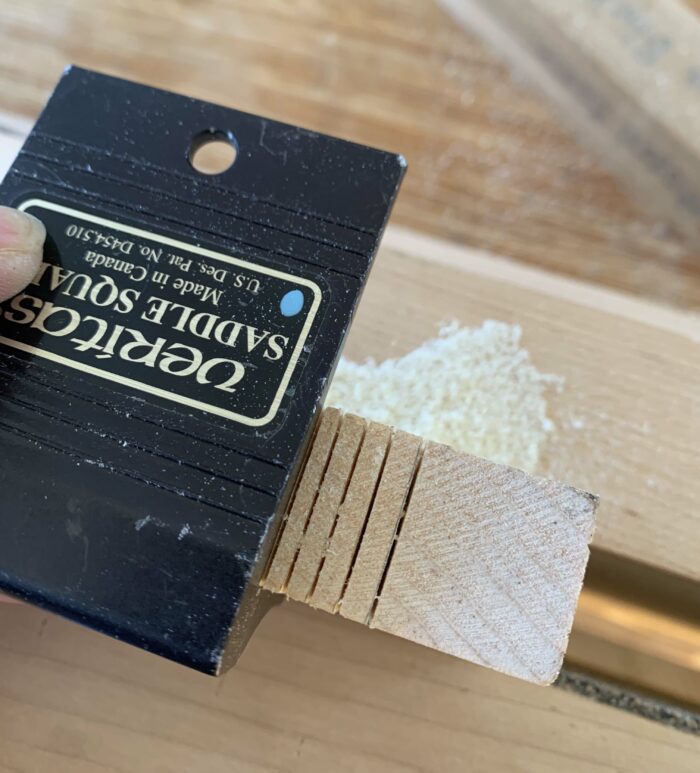
Practice until you can reliably follow both lines – 90° across the top and straight down. Check your work. It is either square or not square. There is no “almost” square.
After you’ve mastered that cut, move to the tail cuts – square across the top, angled down the face. Do it in both directions. What’s important for good dovetails is that the cut be square across the face. (The pin cut will be marked off the angle you cut – whether or not it’s exactly on the line you marked.) I’ll bet you find it easier to follow that angle in one direction than the other. Practice more on the one that’s harder for you. Because I (usually) cut tails first, I don’t actually care too much if I don’t perfectly follow my marked angle, but I do try!
Then make the “pin” cuts – angled across the top, but straight down the face. That “straight down” is key here, but for no gaps, you need to simultaneously follow the angle across the top. (In real work in my classes, that pin line is knifed in, then chased with a 0.5mm pencil; I tell students to split that pencil line.)
If you can master these cuts, you’re well on your way to great dovetails, right off the saw.
And I know I’ve written this before, but I use this same exercise to warm up every time I step up to the bench to cut dovetails, with practice lines in the dovetail waste. Three cuts in a row straight across before I cut my tails, and three cuts in a row straight down before I cut the pins.
P.S. If you’d like to take a class with me, there are openings in my 2022 classes at the Florida School of Woodworking in Tampa, Fla., and the Woodworking School at Pine Croft in Berea, Ky. And yes, both involve dovetails, and we’ll practice the above in class to get warmed up.


