
If you cut rabbets by hand, there are some tried-and-true methods. Vic Tesolin covers three wonderfully in Handwork: Three Ways to Cut a Rabbet Joint. Megan Fitzpatrick weighs in, too, in Three Planes for Cutting Rabbets. Megan and Vic are whip-smart pros, and any hand-tool worker would do themselves a favor by getting familiar with their strategies. Before I got a router table, I used all of these methods and tools. Among them, a moving fillister plane was my favorite. But these methods have some catches.

The catch when using a moving fillister plane—heck, almost any plane—is grain direction. With a rabbet, sometimes you need to cut downhill, especially if you’re using a fenced plane. (A router plane may avoid this issue, but it also doesn’t leave much reference surface for the sole.) The plane’s fence is the second catch. When I work by hand, I don’t square the ends of a board unless I absolutely have to. It’s just a ton of effort. But if you rabbet the end of a board using a fenced plane, that end should be square. Otherwise, the rabbet ends up askew. Even if you don’t use a fenced plane, planing across the grain can still leave a raggedy surface unless your iron’s skewed and/or light-saber sharp. This was exactly my dilemma when making a frame-and-panel toy chest whose panels were rabbeted on the show face. This is also where the dark horse entered the race. Will Neptune covers it in Strong and Stylish Dovetailed Dividers, but I want to bring it to the fore here.

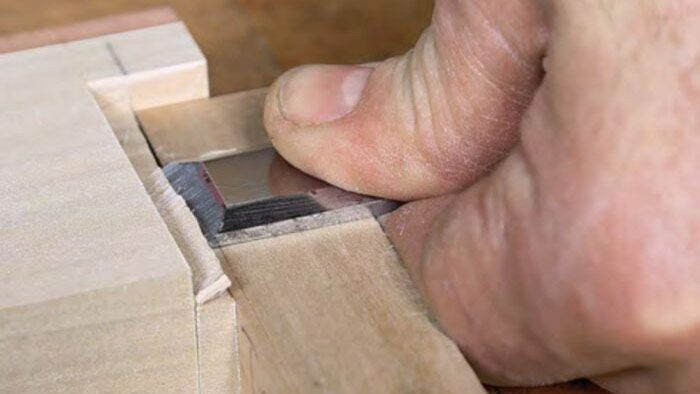
Behind the dovetails on the show face, Will’s dividers have stub tenons. On one type of divider, that stub’s a rabbet. The way he cuts it is brilliant. For one, he chops the rabbet’s shoulder, relying on a knife line to accurately lay out and register his cuts. Then there’s departure from the planing methods: He uses a paring block to accurately control the thickness of the remaining tongue (and, alternatively, the depth of the rabbet).
Because it’s a cinch to plane the block to the exact thickness you want (and little is lost if you have to chuck it and start over if you go too far), this method is almost forehead-slappingly simple.

It also circumvents the shortcomings of using a plane. First, grain direction becomes much less of a concern, since rabbets aren’t normally wide, and you’re chopping stop cuts anyway. Second, the board’s ends no longer need to be square; only the knifed shoulder does, which is standard handwork. It also provides plenty of reference surface for the cuts, unlike a router plane.
This isn’t about which method is better or worse, which is right or wrong. In fact, on my aforementioned blanket chest, I still used my moving fillister for the long grain. The paring block didn’t come in until the end grain. So I consider it another tool in the tool chest—one I’ve painted yellow and labeled so I can quickly find it. I recommend you give it a shot next time you’re in a hand-tool jam.


