
Synopsis: You can remove a lot of the stress from furniture making if you educate yourself about the working properties of different types of glue. This guide from Bob Van Dyke provides the knowledge every woodworker needs about the pros and cons of each glue type and which ones to choose for specific jobs. Factors that play a role in a glue’s usefulness for a specific project include working time, clamping time, cleanup, water resistance, cost, and shelf life.
I can’t think of a more mundane subject in woodworking than glue, but knowing the working properties of the various glues available and matching their specific traits to a particular glue-up is important. It can turn a stressful situation into a very methodical and precise task. I teach my students to learn the pros and cons of each glue type and then choose the one that best fits the task at hand.

Almost all woodworking glues, when used according to the manufacturer’s instructions, yield a bond that is as strong, or stronger, than the wood itself, so strength is not the issue. While I definitely lean on yellow glue and Old Brown glue for the bulk of my glue tasks like panel glue-ups, joinery, and carcase glue-ups, I do turn to epoxy, cyanoacrylate, hot hide glue, and urea formaldehyde glues for certain other things like veneering, laminating, sizing templates, and filling voids. When choosing what glue to use for a specific task I think about what is going to get the job done most efficiently, with the lowest amount of stress possible, and with the best end results.
Yellow glue is a shop standard
Most woodworkers use yellow glue (aliphatic resin or PVA) for most, if not all gluing tasks, and it is always on hand in my shop. It is easy to use, readily available, dries quickly, and has a proven track record.
But it does come with a few drawbacks. Yellow glues have an extremely short working time. The label on Titebond Original states about 15 minutes and Titebond III adds another 5 to 10 minutes, but I have found in most cases that is just wishful thinking. Sliding a tenon up or down in its mortise is virtually impossible after just two or three minutes of assembly. This leads to a huge amount of stress and can result in misaligned joints after the glue has dried. I don’t recommend PVA for tricky joints or glue-ups involving a lot of parts, unless you are able to break the glue-up into stages.

Yellow glues are also well known for their tendency to creep, making them a poor choice for veneer work that involves visible joints or inherently unbalanced woods like crotch and burl veneers. There is nothing worse than spending hours making a complex veneer pattern and seeing the joints open up after a week or two.
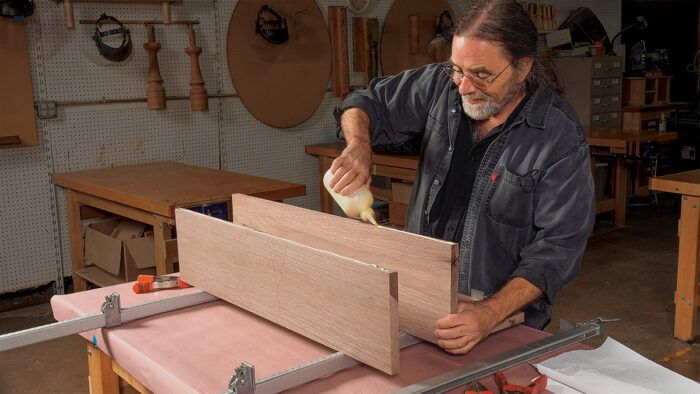
Yellow glue does excel in a lot of areas though, and that’s why it’s such a workhorse in the shop. There is no point in using any other glue for simple everyday glue-ups if the advantages the other glue offers are not important in a given situation. Take advantage of yellow glue’s simplicity when it works for you. Since the clamp time on yellow glue is short, I regularly use it to glue up panels. In a porous wood like pine or walnut, I can remove the clamps after 20 minutes.
The stats on PVA—It’s an all-around shop glue, with about 5 to 10 minutes of open time. You can usually unclamp between 30 and 60 minutes, and clean up with water.

Liquid hide glue
I discovered Old Brown Glue (OBG) several years ago, and it is my go-to glue for anything other than a straightforward glue-up or a panel glue-up. It is basically traditional hide glue to which urea has been added, making it liquid at room temperature. Because of its extremely long working time and simple cleanup, it is ideal for any complex glue-up. Another trait of OBG is its slipperiness. It acts like a grease when you’re assembling tight joinery. This, coupled with the fact that it does not swell the joints quickly, makes it my glue of choice for all dovetail joints, complex glue-ups, and any mortise-and-tenon assembly that involves more than four or five joints.
I don’t use it for glue-ups where its unique working characteristics are unnecessary. Its long working time (30 to 45 minutes) means it has a correspondingly long clamp time (the time required for the glue to set sufficiently to allow the clamps to be removed without compromising the joint), which becomes an unnecessary disadvantage when that long working time is not needed. Removing the clamps on an unstressed glue joint in less than four hours is asking for trouble. Leaving the joint in clamps overnight is safer but can be inconvenient.

At room temperature, OBG is too thick to spread and should be heated to at least 110°—putting the bottle under hot running water or into a glue pot or crock pot for a few minutes is sufficient. Don’t microwave it.
Reversibility is possible. I have heated misaligned joints that were put together with Old Brown Glue, taken them apart, and easily re-glued them correctly. Doing that with any other glue involves drastic repairs.
The insider’s take—Liquid hide glue is reversible, perfect for complex glue-ups, invisible under a finish, and has a long open time. Clamp time is 6 to 12 hours, and it cleans up with water.

Hot hide glue has its uses
Animal protein glue (hide glue) was the glue used in almost all furniture built before 1940, and it is still very popular among traditional furniture makers. It sets quickly, is not visible under finishes, and is easy to clean up with water. Hot hide glue has an even shorter working time than yellow glue. Because it starts to set as soon as the temperature gets below 120°, you have little time to spread glue, let alone assemble and adjust the parts. Many furniture makers use this working trait to their advantage when making a rub joint. Traditional hammer veneering with hot hide glue exploits this same characteristic and is a very efficient way of applying veneer.
Urea formaldehyde
Rather than being all-around adhesives, urea formaldehyde glues are formulated for specific tasks. I use them primarily for veneer work and bent laminations, at which they excel. Both tasks require a long open time and a hard glueline. Hide glue and polyurethane glue fit this category, but urea formaldehyde glues such as Unibond 800 are the best. The open time and clamping time of Unibond 800, developed by veneering expert Darryl Keil, can be easily adjusted by altering the ratio of resin to hardener. And clamping time can be sped up by increasing the room temperature. I learned the hard way that it requires a minimum room temperature of 70°. Years ago, I ran a class in the winter and the veneered projects were left to cure overnight. When the heat was turned down at night it caused the glue to fail and the next day we had to peel up all the veneer. I now cover a urea formaldehyde glue-up with an electric blanket.

Unibond 800’s long open time and rock-hard glueline make it the perfect choice for bent laminations. Once cured, there is no spring-back at all. Squeeze-out is nearly impossible to remove, short of cutting it off. Make parts oversize so you can trim them to size once the glue is fully cured, removing the squeeze-out. While I do not normally consider expense or shelf life with glue, it should be noted that Unibond 800 does have a one-year shelf life and will fail if used beyond its expiration date. If the resin thickens up like honey, it is no longer usable. Always buy the smallest amount you think you will use in a year.
The lowdown on urea formaldehyde—Great for bent lamination and complex veneering. Open time up to an hour, clamp time between 5 and 13 hours depending on temperature and mix. Clean up with water.

Epoxy, the problem solver
Epoxy is the only gap-filling glue on the market, and this characteristic can be a life saver when it comes to filling knot holes and gouges, and when gluing parts that do not have good mating surfaces. I also use it to prevent fissuring in crotch veneers. When faced with an outdoor project, my glue of choice has always been epoxy.
The working and clamp time of epoxy is easily adjusted by using different hardeners, and adjusting the viscosity is a matter of adding various thickeners to the mix. Thickeners can even be added to transform the glue into a “fairing” putty, which is used extensively in boat building, and thin epoxy can be used to repair damaged or rotted wood.
There are many epoxies on the market, and I recommend choosing one such as West System or System Three, learning the product, and staying with it.
The straight facts on epoxy—It is the standard for marine use and any outdoor project; also suited for gap-filling repairs, and it will stabilize crotch and burl veneer panels. Open time can vary from 5 to 60 minutes, and clamp time can vary as much as 45 minutes to overnight. Clean up with acetone.

Cyanoacrylate
When I need to bond something instantly, cyanoacrylate (CA) glue is an obvious choice. CA glue, with or without an accelerator, yields an instant bond. But I have heard of long-term failures, so I limit its use to workshop jigs or other non-furniture applications. I use it to harden the edges of MDF router templates and mat board tracing patterns. Once the CA glue soaks into the edges, it is rock hard.
The skinny on CA glue—Use it to make small, non-structural, fast repairs, and to harden edges of templates. Open time and clamp time are less than a minute. Clean it up with acetone.

To view the entire article, please click the View PDF button below.
Download FREE PDF


