In my tool chest class at the end of February, I had a student who flew in from Colorado, and because I’m a lobster (hard-shelled but soft on the inside), I said I’d make a crate and get his tool chest to the trucking depot. Note: most proper woodworking schools will make students do this themselves…but we don’t claim to be a “proper” woodworking school; we just offer an occasional class from time to time in our shop.
And every time I post a picture of a crate on Instagram, someone asks how we make them (heck – maybe we should offer an Anarchist’s Crate class!). So here’s our method – though I suspect people who make shipping crates for a living will scoff. But Christopher Schwarz and I make furniture, so we build crates like (bad) furniture: hardboard, a few 2x4s, a 4×4, and a lot of screws (and for square or rectangular stuff, hard insulation panels as padding). So far (knock on hardboard), these have survived all but one journey. (Thankfully, the chair was fixable in the one that got forked.)
Step one is to measure the overall dimensions of a piece then add 2-1/4″. My student’s chest ended up 41-1/2″ long x 25″ deep x 27-1/2″ high. So for this chest, I needed two panels each at 43-3/4″ x 29-3/4″, 43-3/4″ x 27-3/4″, and 29-3/4″ x 27-1/4″.
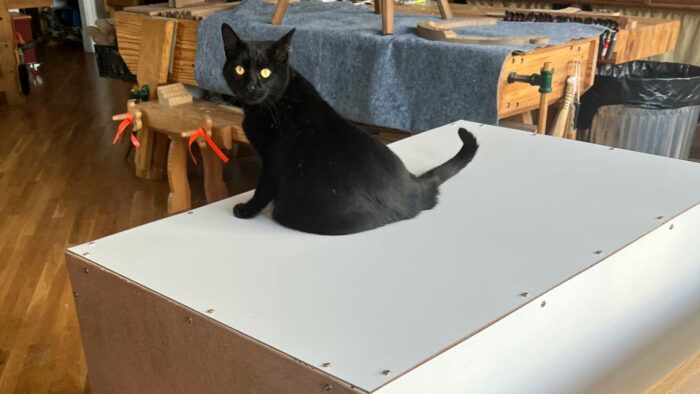
We used to use 1/8″-thick plywood sheathing, but the price on it has gone up significantly in the last few years, and, most problematic, our local home center was out of for several visits in a row. So we’ve started using hardboard with a coating on one side, because it was the least expensive sheet good that we thought might work. (And usually, I put the white side in on all sides…but clearly not always!) The label says it’s Eucatile Diamond White Lab. 1/8″ x 48″ x 96″; its nominal use is as wallboard (thank you, no).

The sticks to which the hardboard is screwed are 1-1/8″ square, cut from 2x4s (this is the least expensive vs. maximum yield we’ve found). In this case, four of them are 43-3/4″ long, and reach from end to end on the bottom and top panels. The remaining eight sticks fit inside these in the corners, and are thus 2-1/4″ shorter than the edges to which they are screwed. We use 1-1/4″ construction screws to attach the hardboard to the sticks – three to five on each corner, depending on the length of the edge.

To make it easier for the trucking company to get a forklift underneath, we use lengths of (untreated) 4″ x 4″ at each edge, screwed through the sticks with 3-1/2″-long construction screws, and through the hardboard more 1-1/4″ screws; this makes it into a skid, per the trucking terminology. On larger crates, such as this one, I also use a central skid.

Here’s an embarrassing confession: Until a few crates ago, I did not realize the bit holder that is usually in one of our drills was a) a screw guide and b) how to use it. I used to get routinely annoyed when the sleeve slipping down. Face palm. (What can I say…I use a lot of nails, but I rarely use screws!)

With the crate buttoned up on all but the top and one side, it’s time to drop the project in place. In the case of an Elighs too chest, I pad out the recess formed by the skirts with 1″-thick rigid insulation (the skirts are just shy of 1″ thick), then pad out the space between that and the crate walls with more insulation. (In the case of a finished project, it usually gets wrapped first in moving blankets to protect the paint/shellac/oil and wax/whatever.)

After screwing the front and top panel in place, I weigh the thing (this one is 142 lbs), then get quotes from the trucking company and let the customer, or in this case, my student, know how much it will cost to ship to his home vs him picking it up at his local depot, and await instructions. (It typically costs between $150 and $500, depending on where it’s going and if it will be picked up or dropped off. And while I’m sure there is logic as to the pricing, darned if I can figure it out – it costs more to deliver to Denver than Seattle right now.) Then comes the hard part – getting this 142-lb. crate into the back of the pick-up truck, and up to the YRC terminal 21 miles north of the shop during their receiving hours: 4 p.m.-3 a.m., if memory serves.

Crating a chair or other odd-shaped project just involves a few extra steps, and a few extra sticks. On those, we wrap the pointy bits and use cardboard and/or bubble wrap to protect to crest and hands, then restrain it with sticks across the arm and top, and sometimes behind the front legs. These sticks are simply screwed through the sheathing.

More from Megan Fitzpatrick
 |
Sawing homework |
 |
How to build a Dutch tool chest |
 |
Build a Saw Bench |


