
[ad_1]
Color grading has been used in movie post-production for years to emphasize visual tone and atmosphere, making footage look more cinematic.
Color grading is also used in photography to change or enhance the colors of an image to help the photographer portray a certain feeling to the viewer.
In this guide, we’ll discuss how to color grade both your video footage and photos using the latest editing software.
Even if you’re just beginning your editing journey, you’ll learn some handy tips from the basic color correction process of creative professionals.
What Exactly is Color Grading?
Color Grading in Photography

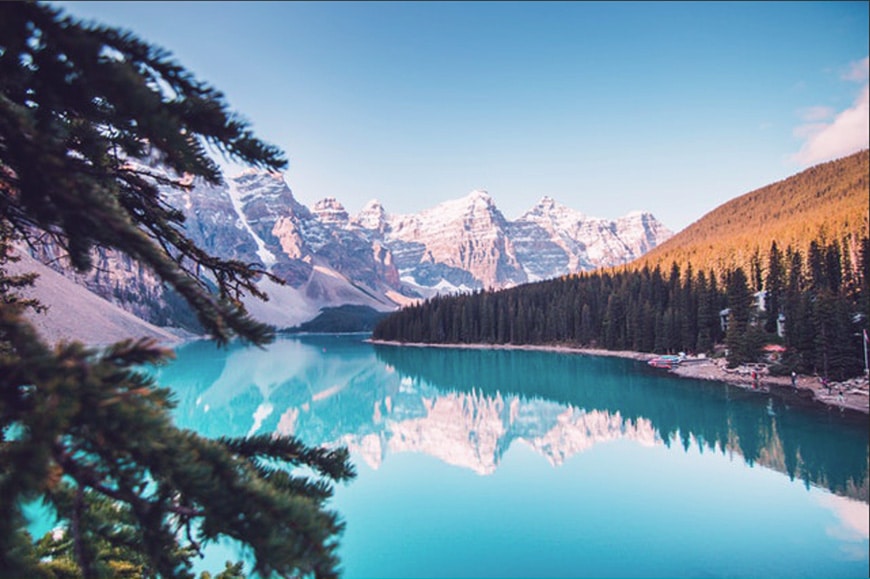
Photo credit: Jaime Reimer
Color grading in photography is a technical process that allows you to separate the pixels of your image by brightness values (highlights, midtones and shadows) and apply a different color tint to each part.
Even if you’re working on separate parts, any adjustment you make will change the mood of the whole image – that’s what makes color grading so powerful.
You’ve probably done this before, but you knew it with a different name. For example, many people refer to this process as color correction. However, there is a difference between color correction and color grading – I’ll talk about that later in the article.
Another name you’ve probably heard before is Split Toning. For example, in Lightroom, this was the only tool available for color grading.
Unfortunately, it was a bit limiting because you couldn’t work on the midtones separately. This panel only included two sliders – one for highlights and another for shadows – also, it worked only with sliders.
The new grading tool has three color wheels each one with its own set of sliders.
Perhaps you’ve also worked with LUTs (LookUp Table), which is a series of automated commands that color grade an image. As you can see, you’ve probably been doing this process in your post-production workflow all along, and you didn’t know it.
While color grading in photography is mainly done in post-production, it can be done in-camera too. Most cameras offer Sepia or Black and White color grading, but others provide more choices.
For example, the ones from Fuji offer vintage film looks to color grade while capturing images.
Keep in mind that using the presets of your camera doesn’t mean that you don’t have to do some colour correction afterwards – but you can do that with the basic tools of any photo editing program.
You can use LUTs to color grade your images automatically too. There are LUTs available online for sale and for free while some programs such as Photoshop, include some of them by default.
Color Grading in Video
Color grading is an essential part of a three-step process to manage the final color in a video. First, you have to choose the picture profile. Then, do the color correction. Finally, the color grading is to add a specific mood.
For the picture profile, you can choose a flat or log profile on your video camera – for example, a C-Log on Canon. Each profile will have a different amount of information – this means that you’ll have more or less room to use the editing tools.
Many professionals like to use a flat picture profile because this gives less contrast, and it’s easier to work on highlights and shadows in post-production.
Regardless of the profile, you then need to color correct your video. Here you can adjust the white balance, hue/saturation, find complementary colors, etc.
Then, you do the color grading. This step gives character to the scene – that’s why the director and the photography director decide the color scheme – then it’s applied by the colorist.
If you don’t want to do the color grading manually, you can use a LUT.
What is the Difference between Color Correction vs Color Grading?
Color correction in photography is about adjusting the white balance – usually, you’d try to achieve the color temperature of white light.
It also means that all the photos from the session need to look consistent. For this, you make a reference shot with a grey card or a color checker – then you color match all the images to that one.
Video color correction works similar to how it does in photography. You need to adjust the white balance to the right color temperature. Then, you need to get a consistent look throughout all the footage coming from the different cameras.
Instead, color grading – both in photography and on video image is a coloring process that gives a particular mood to the scene. It’s not about color correcting – it’s about a creative vision.
How to Color Grade Video in 4 Simple Steps
Typically, color grading is heavily influenced by decisions made on set by the director and director of photography (DOP).
As long as footage has been captured in RAW or LOG format, a color grader can apply non-destructive edits to help the director achieve his/her final vision.
You’ll find basic color grading tools in all the video editing software available in 2022.
Whatever color grading software you choose, here are the steps to take:
1. Normalize your video footage
Here you take advantage of all the information recorded in your video. You use the dynamic range to improve the recording’s exposure, contrast, and saturation.
A good workflow to do a primary color correction is to adjust the exposure, the white balance and saturation of the entire image. You can see this in action in the above video.
You can start by adjusting the black and whites of the scene, then proceed to the shadows and highlights. Once the exposure is right, move on to the white balance – you can do this with the color temperature and the tint sliders, but you can use the automatic tool included in most programs.
Now, work on the saturation. Then, repeat the process on each shot.
2. Color correct your video
Now that your digital video has a consistent look and you got the lights and colors looking natural, you can proceed to adjust specific areas with a secondary color correction.
This secondary correction targets specific areas or objects from the scene and does a selective color correction. For example, if you need to fine-tune the skin tones.
If you watch the video above, you can see how a yellow post in one shoot looks greenish – so he targets only that color and corrects it without affecting the rest of the scene. He also uses a mask to lighten a specific area.
3. Move on to digital color grading
Now that things are technically OK, it’s time for the creative vision to take place. You can do the color grading process in the same program you were using for the colour correction – for example, the author of the video does the entire process in Premiere Pro CC. Other people prefer to do this part with specialised software such as DaVinci Resolve.
Sometimes the creative team provides color palettes to the film colorists – if this is the case, you can stick to that. If not, you can create a color scheme of your own. You should get some knowledge of color theory for better results.
In the video, you can see the author uses the teal/orange contrast because this contrast highlights the skin tones and separates them from the background.
You can also apply a creative LUT to make the process automatic. You can create your LUTs or download them – you can find many of them online, some for free and some for sale.
4. Fine-tune your work
This is especially important if you used an automatic method (LUTs), but also if you made the color management manually.
Basically, you need to check that the entire video is color corrected and color graded properly. If not, make the necessary adjustments.
How to Color Grade Photography in X Easy Steps
In 2020, Adobe introduced a new Color Grading feature to Lightroom. You can still perform more advanced color grading in Adobe Photoshop, but Lightroom should be good enough for most photographers.
Here’s how to do it:
1. Import your image(s)
As you probably know, to edit your images in Lightroom, you need to import them first. You can do this in the Library module. This is because Lightroom works on a copy of your file so that your original stays safely untouched.
2. Open the Color Grading panel

Now, switch to the Develop module – on the right, you’ll find the panels with all the editing features. Look for the panel named Color Grading and open it.
If you can’t find it – make sure you have updated your Lightroom. The color grading tool was released in October 2020, and it replaced the Split Tone feature.
2. Choose the layout of the panel

In this panel, you’ll find all the tools for color grading. The first ones are five circular icons – these change the layout of the rest of the tools.
By default, you’ll be on the first one – three circles that represent the three color wheels underneath. The top wheel is to adjust the midtones, the one on the bottom left is for the shadows, and the third one on the bottom right is for the highlights. Under each one, you’ll see the Luminance slider.
The following three icons display the same color wheels but separately. These individual views allow you to work more accurately because each color wheel is bigger.
The fifth icon is the Global adjustment which affects the entire image.
3. Make the color adjustments using the color wheels
Now that you’ve chosen the layout, click and drag on the color wheel to do the color grading. Each color is called a hue. As you get away from the centre of the wheel, the saturation of the hue increases.
If you’re using any of the single color wheels (any of the three middle icons), you can open the Hue – Saturation sliders and make the color adjustment there. You won’t see them immediately, but you can make them visible by clicking on the arrow found on the bottom right of the color wheel.
Directly underneath, you’ll find the luminance slider, which is the third color factor, and it refers to the brightness of the hue.
You can click on the eye icon to toggle between the before and after versions of the image.
If you want to learn more about color wheels and choosing the right color for your designs or photography in general, check out our article on Adobe Color.
4. Adjust the blending
When you’re done choosing the color tones using the color wheels, you can move on to the last two sliders. The first one is Blending, and it manages the overlap between the highlights and shadows.
This helps you to achieve smooth transitions between the different tonal ranges. You can see in the video an example of how this adjustment affects the image.
5. Fine-tune the balance
The last slider is called Balance. As the name says, it adjusts how the effect is balanced between highlights and shadows. In other words, it changes which tones are considered highlights and which ones are shadows. Again, you can see how this works in the video to have a better idea – of course, you can just play with it on your pictures and see the results.
FAQs About Color Grading
Is color grading necessary?
You can do without color grading if you’re just shooting a video for your friends or family to remember a special moment. However, if you want to do professional films – commercial or artistic – you definitely need to colour grade.
What is the best color grading software?
DaVinci Resolve is one of the best for video color grading – also Adobe Premiere Pro and Film Converter. For still images, the best are Adobe Photoshop, Luminar AI or GIMP for a free alternative.
Why is called color grading?
Color grading is the name of a technique used in labs when you process film. It’s used to modify colors with chemicals while passing from a negative to a positive image. The name was inherited to the digital technique of adjusting colors using software with the process explained in the article.
Is color grading done before editing?
In professional filmmaking, the process starts even before shooting with a conscious decision that determines the file format (or the type of film), a specific workflow, etc. However, color grading in post-production is done after the basic edits, and it can be done just by adding a creative LUT.
How long does it take to color grade a feature film?
The average time to color grade a film is around two weeks (or 80-100 hours). However, there are many variables to make an accurate time estimate. Remember, you need to include the render time when estimating or quoting a project.
Final Words
Color grading is a fascinating and complex subject – if you want to become a professional colorist, there’s a lot of material and technical terms to learn.
However, even if you’re not going to specialize in this area, it’s still useful to have a general idea if you’re a photographer or a videographer.
Hopefully, this article was a good introduction to the topic so that you can start to color grade your work and see how big a difference it makes.
Let us know if you have any doubts, and share your colour grading tips in the comments.
[ad_2]


