
Making a template that is the perfect complement to the piece you are routing is a lot more complicated than you might think. Bruce Eaton’s multiple-step process yields perfect results. First, make an intermediate template, and then use that to generate the final template, which will be the base of the sled.
Step 1: Create of duplicate of the part to match

To start, you need to create an intermediate template that perfectly matches your primary piece. Trace the piece onto a piece of MDF, bandsaw close to the line, and then use the top to pattern-rout the workpiece.
Step 2: Rout a rabbet before pattern-routing it off

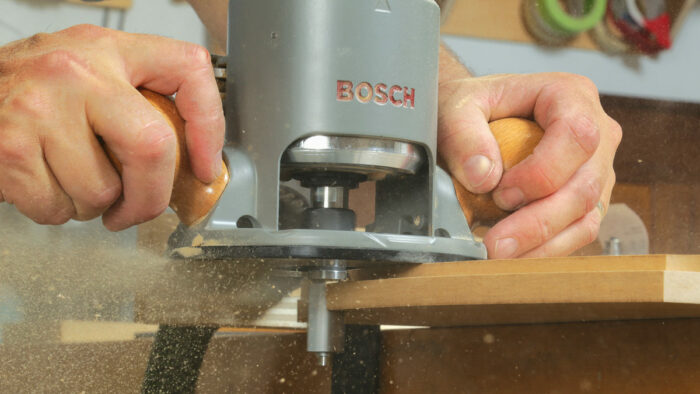
Then, with a flush-trimming bit, cut off the tongue of the rabbet. Now the edge of the intermediate template is exactly ½ in. smaller than your primary piece.
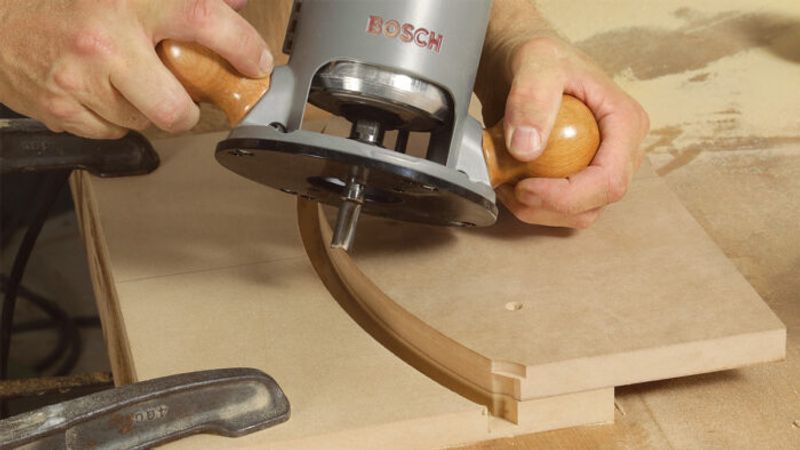
Step 3: Make a final template

To make the final template, clamp the intermediate template to a blank of MDF. Using a 1⁄2-in. pattern bit, plow a curving groove in the blank. Because the diameter of the pattern bit matches the amount you removed from the intermediate template, the outside wall of this groove will match the curve of the tabletop.
Step 4: Bring the final template to size
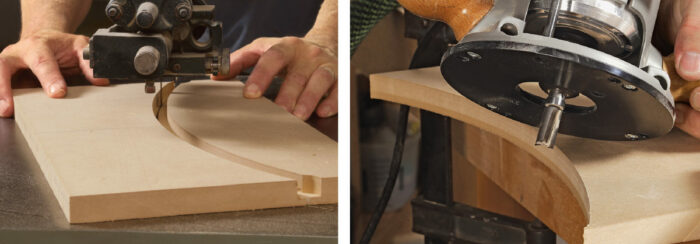
Saw off the inner part of the blank, then flush-trim off the remaining tongue to form the final template. Turn this template into a sled by attaching a fence, two end stops, and two toggle clamps.
Why this two-step process? Because if you were to forgo the intermediate template and employ the same plowed-groove method to make a final template directly from the tabletop, the resulting curve would be off by the diameter of the router bit. But having cut the 1⁄2-in.-wide rabbet in the intermediate template and then removed its tongue, you can duplicate the table’s curve.

The text of this post is excerpted from Bruce Eaton’s “Curved, solid-wood edging” in FWW issue #297.


