
[ad_1]
You’ve probably heard of the Brenizer Method a lot in the past few months. And in truth, it’s a super fun method that can give you results you couldn’t have made otherwise. At least, you could’ve have done these without a medium format camera, large format camera, or wider super-fast aperture lens. In this post, we’re going to dive into posts we’ve done on the Brenizer Method over our years of publishing. We’ll showcase photographers who’ve done it, how to do it, the history, and more.
Who Is Ryan Brenizer, the “Creator” of the Brenizer Method?
Photographer Ryan Brenizer enjoyed a pretty great time rising through the ranks almost a decade ago. His business is still strong, and he more than deserves the success he’s had. For the record, he’s a wedding photographer who has been based in NYC for years. And he’s always been experimental. The Brenizer Method came about when there was an emphasis on some of his unique portraits. Years ago, he used to use long lenses with a wide-open aperture and then created panoramic portraits. Ideally, his photos would be nine images stitched together.
Ryan didn’t exactly create the Brenizer Method, but he resurrected it at a time when DSLRs were actually becoming really good to use. The panoramic portrait stitch method had been around for many years beforehand. Proliferation amongst social media made it come back again.
Which Photographers Have Done the Brenizer Method?
Because we believe in the rights of photographers, we’re citing those who have used and talked about the Brenizer Method in their work. We’ve interviewed these photographers, and you can see more of their work in our hyperlinked interviews below.

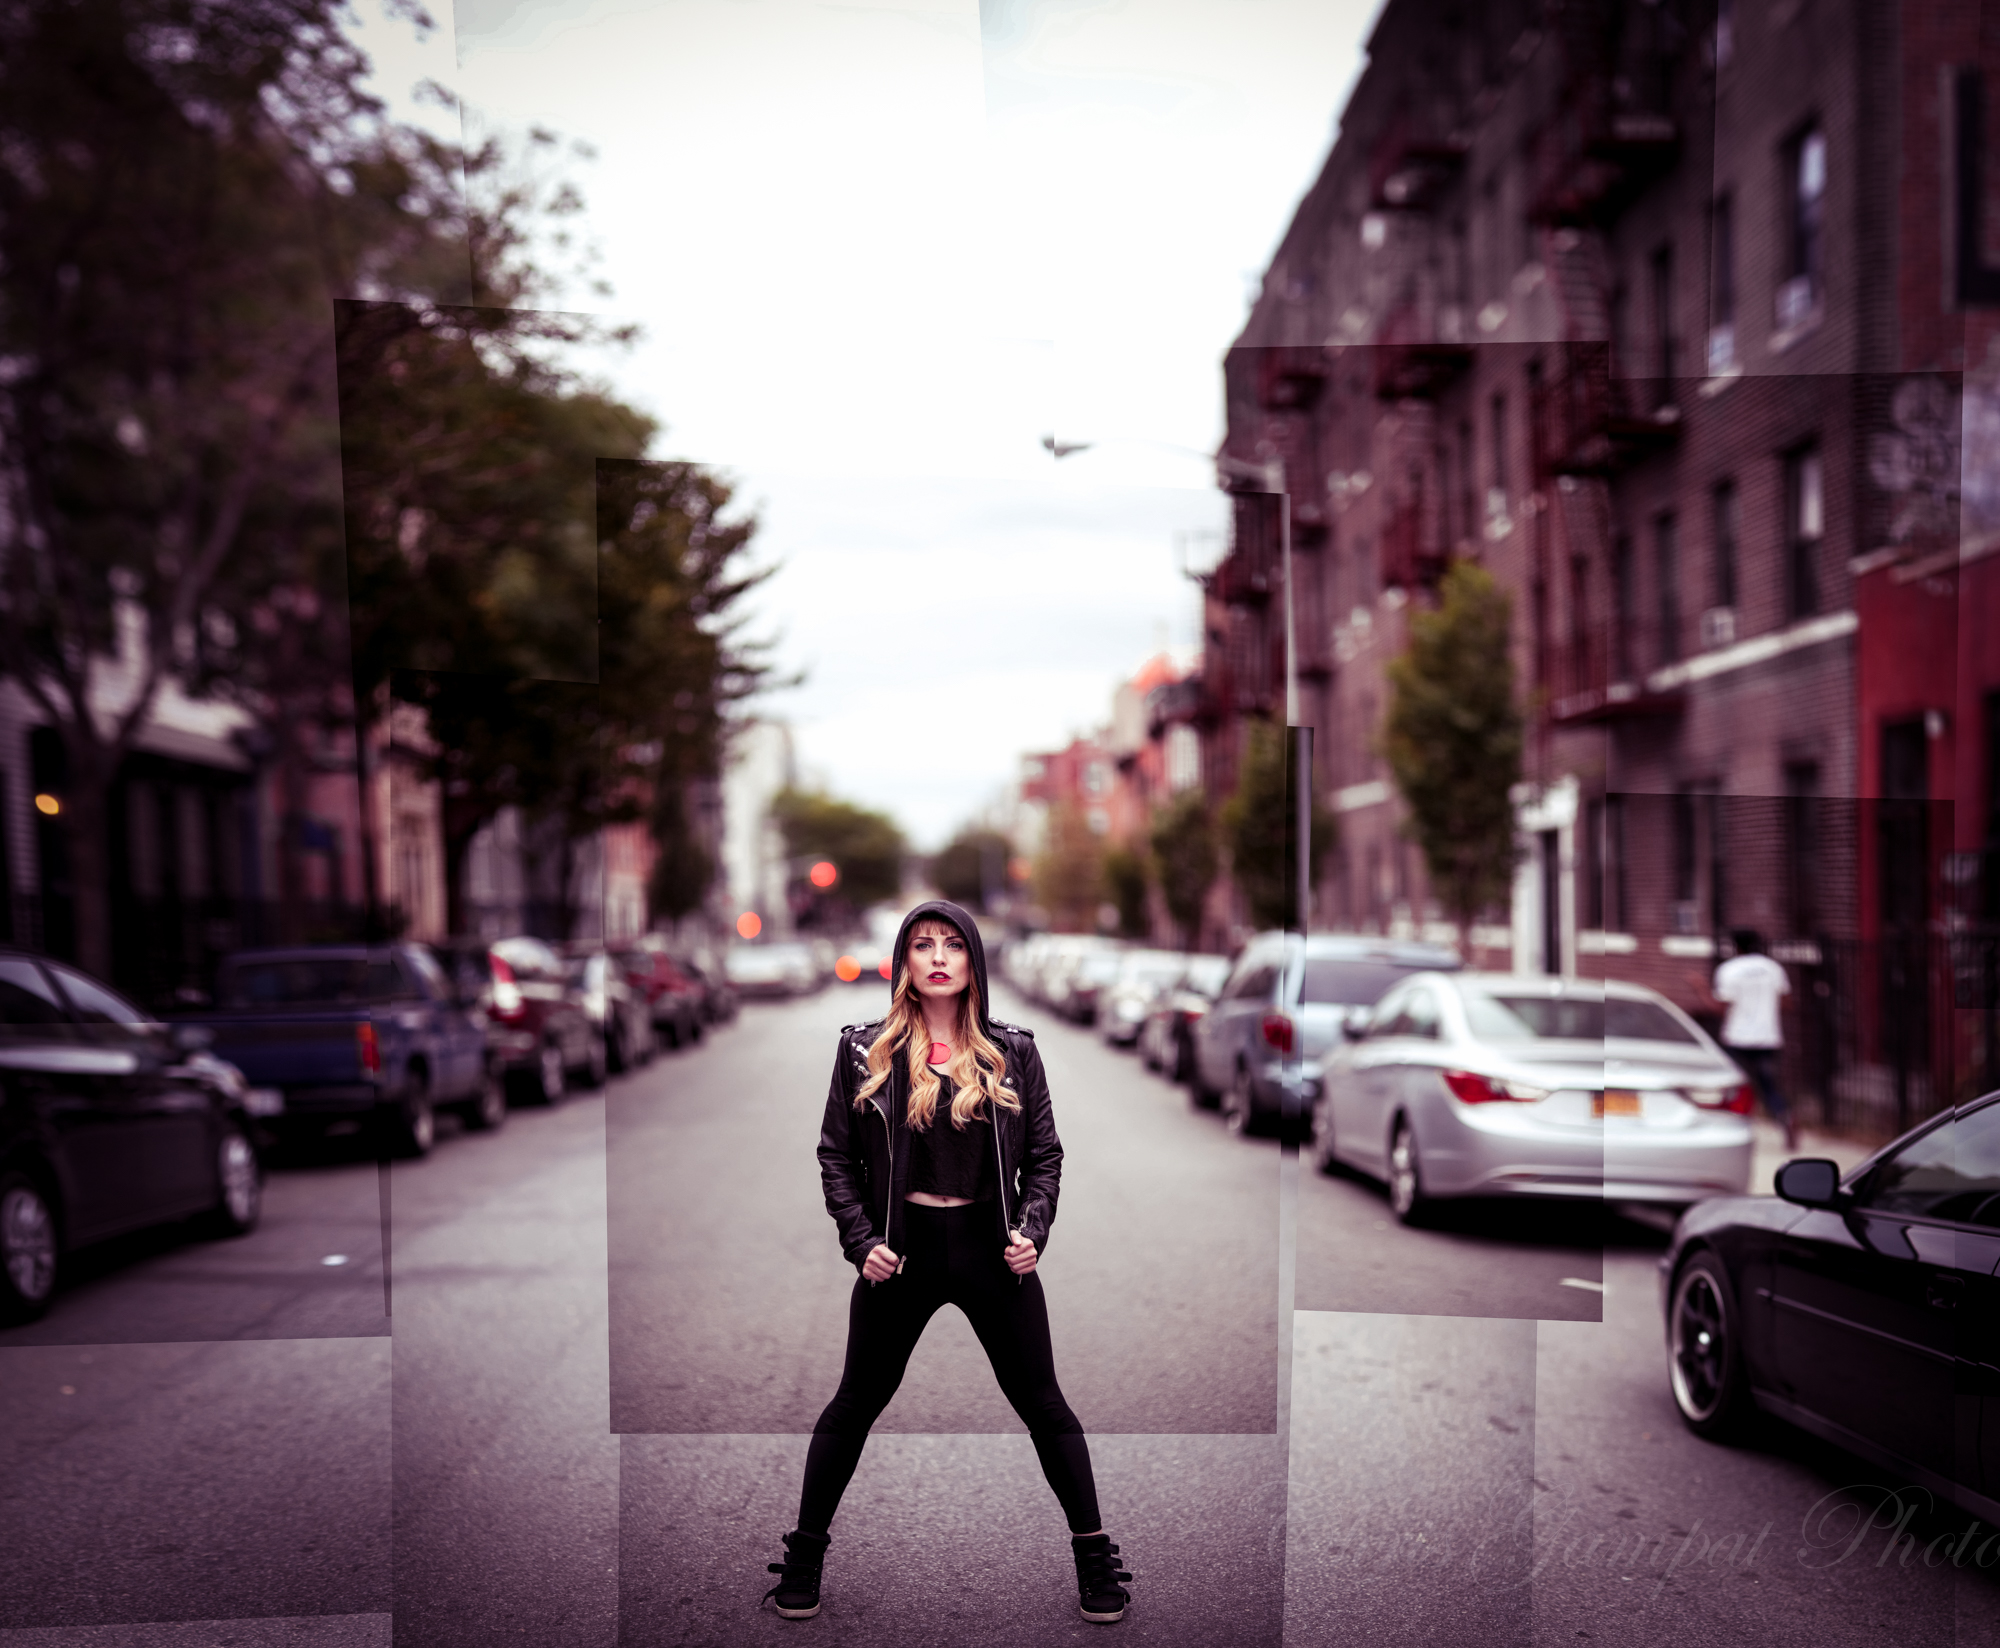
“My first two years of photography I relied very heavily on Photoshop to create my images with a lot of compositing. These days I like to get as much in camera as possible and only play around with colors. But I tend to always expand my images using the Brenizer Method as a way of controlling the whole scene. Sometimes the background itself really adds to a story and I like to think of each part of the photo like a canvas. You have to paint each part individually before it comes together as a whole.” – Sarah Loreth
Sarah doesn’t really shoot anymore these days, but her work helps to show what’s possible with the Brenizer Method. Creating an image like this is pretty much impossible to do without the Brenizer Method. And back in 2015 when we interviewed her, super-fast wide-angle lenses weren’t around.
Another way of doing it is the way Anthony Chang did it. In our interview this was said:
“I love the Brenizer method (or bokeh panorama/bokehrama) because I love shallow depth of field and I love having a wide-angle of view. Nothing more than that to be honest. I didn’t buy a F0.95 (I have the Mitakon 50mm F0.95 for those curious) lens so I can shoot at F8. I want it so I can shoot at F0.95 and get that shallow depth of field. With this method I can get unbelievably shallow depth of field with that wide field of view that would other wise be impossible. Personally I just love the aesthetic of a panoramic photo, I love that crop and framing you get with it.”

Anthony really embraces the idea of the panoramic portrait. Instead of just shooting nine photos around the subject, he goes fully into the left and right sides. It creates a cinematic look!
Also be sure to check out the work of Mark Sapps.
What Is the Brenizer Method
Essentially, think of it as a panoramic portrait method. You’re taking a bunch of photos and stitching them together in Photoshop or Capture One. You’re creating the look of a super-fast aperture wide-angle lens. In 35mm full-frame photography, it isn’t really possible. But you can create this look with medium format film straight out of the camera.
How Do You Do the Brenizer Method?
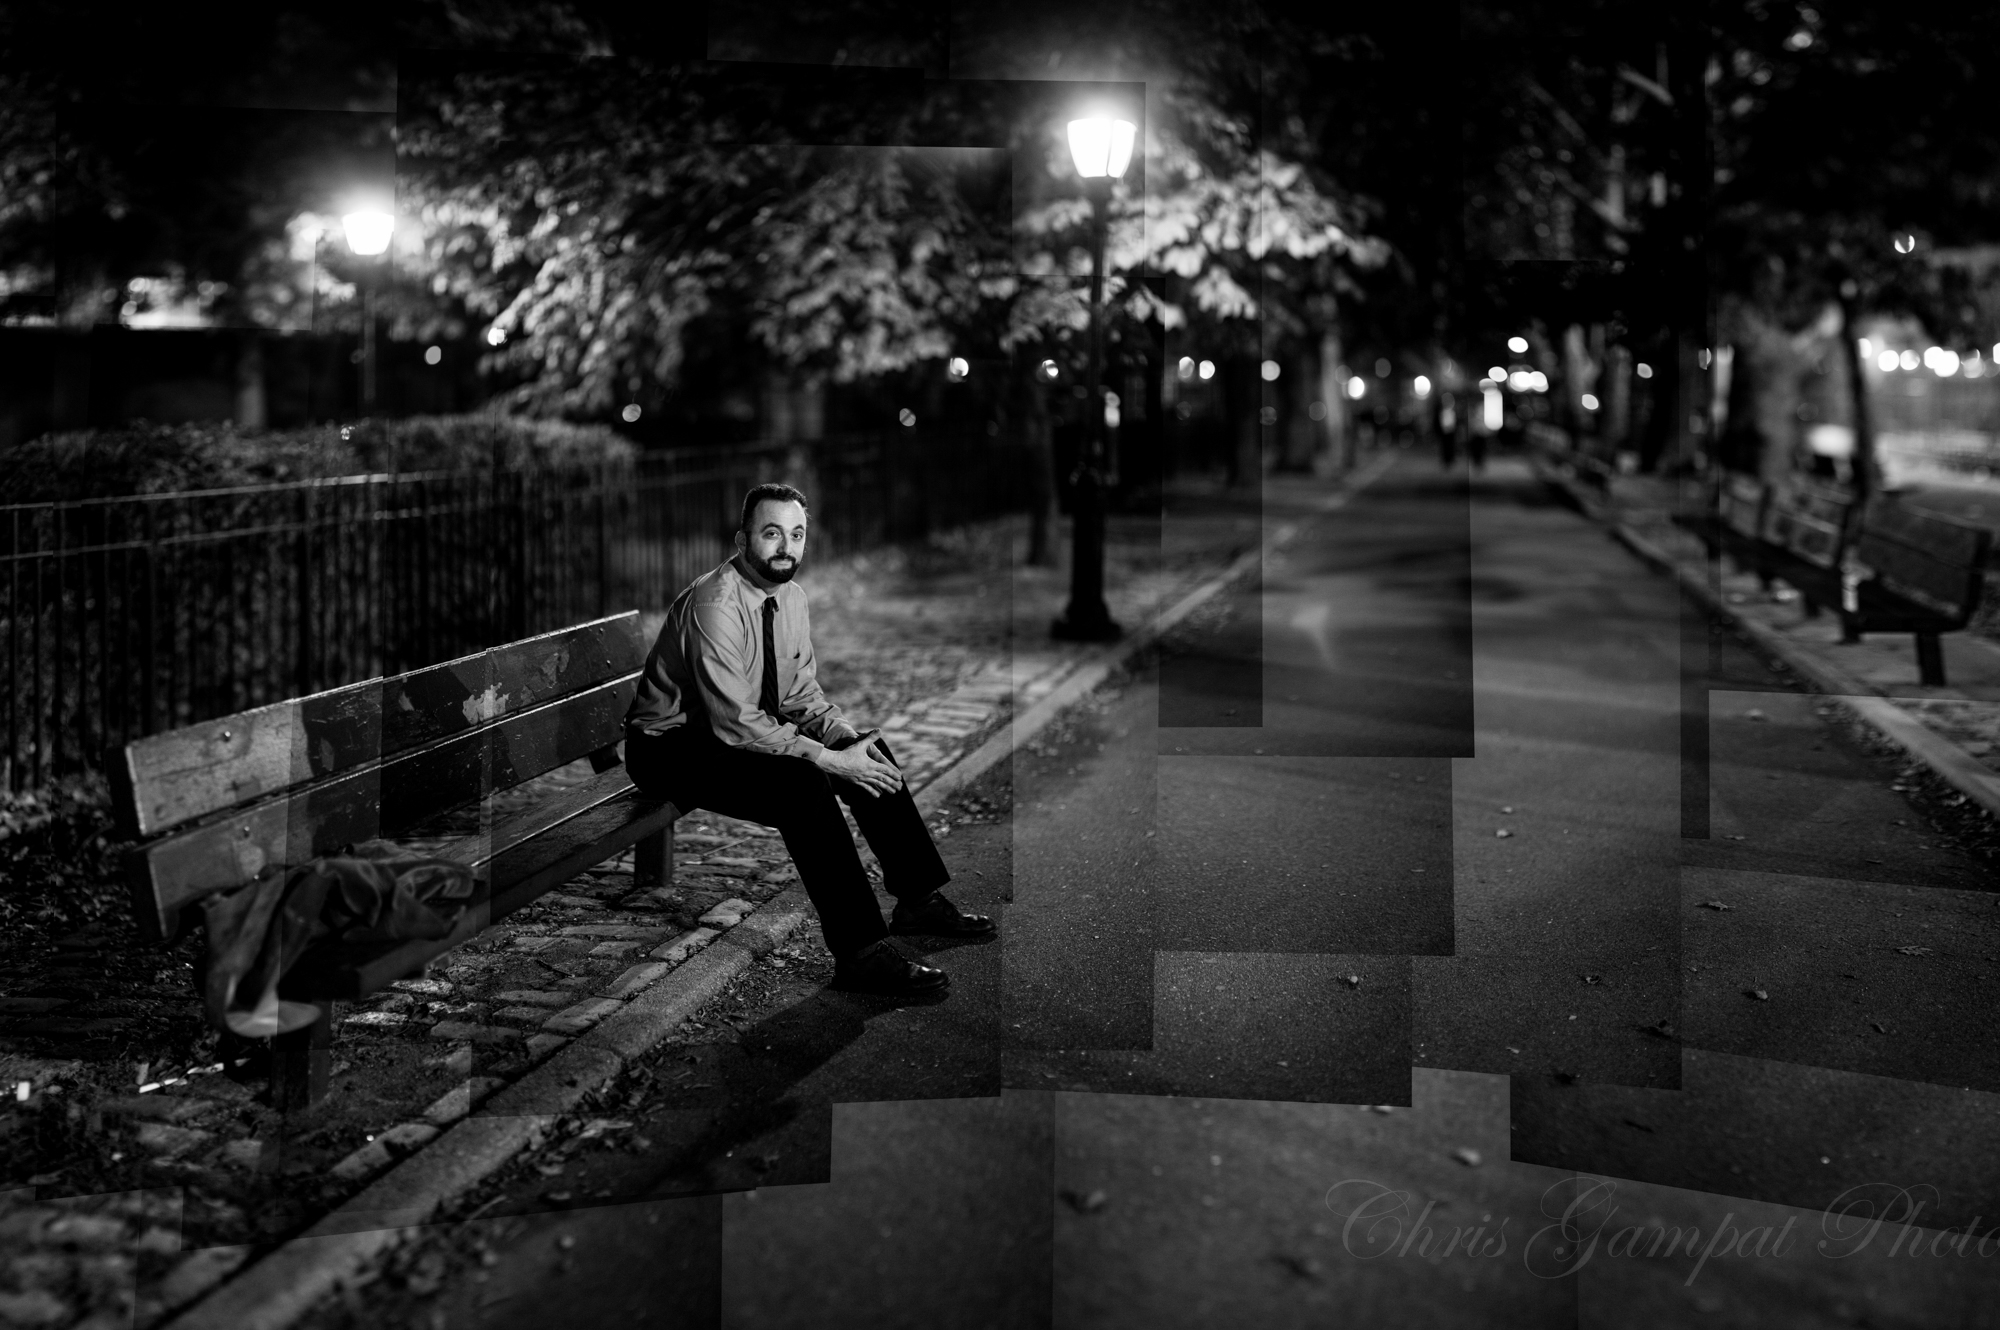
The photo above will really help you see how the Brenizer method is done. It looks like cubism, right? This photo was created back in 2014. During that year, Adobe’s panoramic stitch algorithms weren’t all that fantastic. These days, Adobe’s and Capture One’s are both very good. This specific Brenizer Method photo is super duper complicated though. Here’s what I did:
- Start at Adam’s face
- Set the camera to manual mode and set the exposure manually. Don’t change the exposure at all.
- Focus the camera. Then after that, turn off autofocus. This way the focus is locked in to one position. This is paramount because you need to create the illusion that it’s all one image and not multiples stitched together. By switching to manual focus, you’re fixing the focusing plane on one spot.
- Tilt the camera downward, shoot
- Tilt to the left, shoot
- Tilt upward, shoot
- Tilt to the right, shoot
- Tilt downward, shoot
- Continue doing this in a circular pattern until I build a scene
- Stitch the photos together in Photoshop
This specific implementation of the method is pretty complicated. In most instances, photographers just shoot nine photos. The subject’s face will be in the center, then you shoot down, three to the left, three to the right, and one above the subject. There has to be overlap though so that post-production software knows what to merge together.
“In color, it looked awful–but then when converting the processed image to black and white, it looked awesome.” – A Panoramic Portrait Created a Happy Accident That Looks Like Cubism
Further, if you want a cleaner look, we discovered back in 2014 that you have to have a lens that doesn’t have vignetting. Vignettes can help create the cubism look. Personally speaking, I like the cubism look. But you might not. So get a lens that doesn’t have vignettes, or do some post-production to eliminate the vignetting before stitching together.
The lead image in this blog post is this exact photo, but redone. Again, in this render above, I’m getting a cubism look. It looks pretty cool honestly. Some folks may hate on it and say it’s not clinically perfect. But to each their own. I don’t, and never have shot for lab quality. As we noted back in 2015, you can get this look with smaller sensor cameras. And just for your extra knowledge, here’s another tutorial on how to do the Brenizer Method.
We’ve reviewed lots of lenses, so what do we recommend? As always, we only recommend gear we’ve reviewed.
All of these lenses are a telephoto render, have a shallow aperture, as little vignetting as possible, focus quickly, and have a beautiful look to them. We think you’ll like these.
Happy shooting, and we hope that this helps! The Brenizer Method involves a lot of foresight, and it becomes easier as you do it more often. But you have to have a creative vision. Sure, there’s post-production involved. And honestly, I wish modern cameras could just do this whole in-camera panoramic stitch easily. But they’re not there yet.
[ad_2]


