
Synopsis: Whether they are simple or complex, handles and pulls contribute greatly to the overall look and functionality of a piece of furniture. The team at Hank Gilpin’s woodshop takes care to balance looks with ease of construction to make the best choice for each project. So take a look at their advice and designs, and start designing your own handles. Most of all, have fun with it.
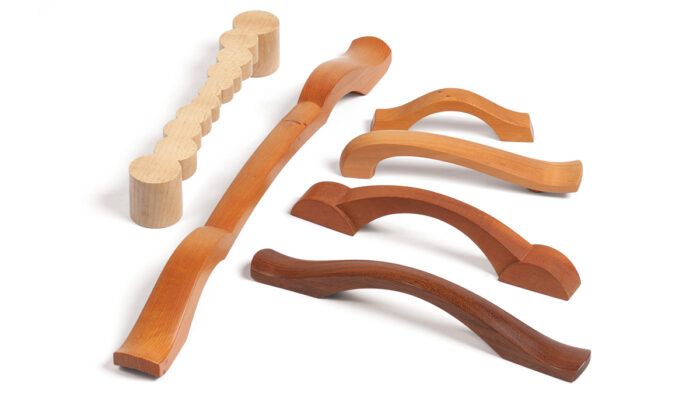
Designing and making wooden handles can be one of the more fun parts of what we do. You can design a fairly simple single-shape handle or a more complex layered pull that has multiple relief cuts and requires a great deal of handwork.
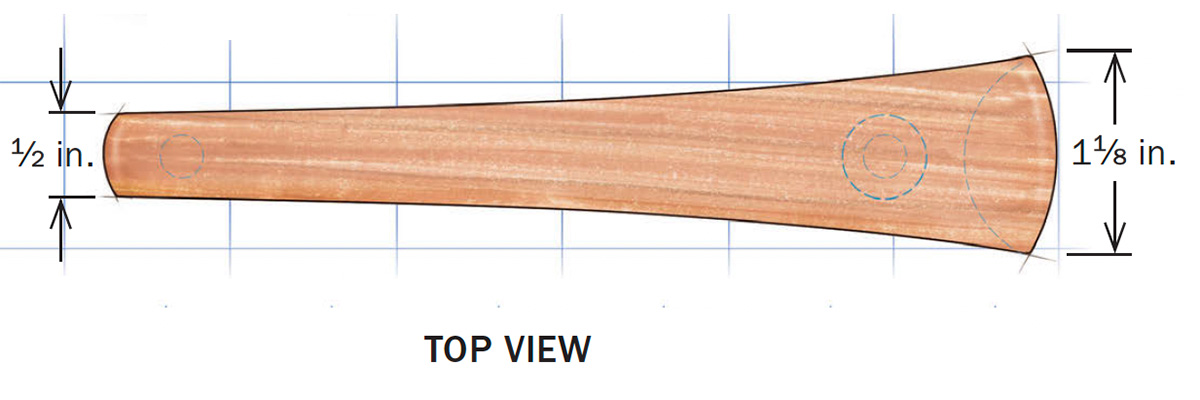
The scale of the piece of furniture and its purpose will completely drive the scale and design of the handle. Is this a pull that will open the heavy drawers of a sideboard filled to the brim, or will it just be used for two small doors on a cabinet in the front hall?
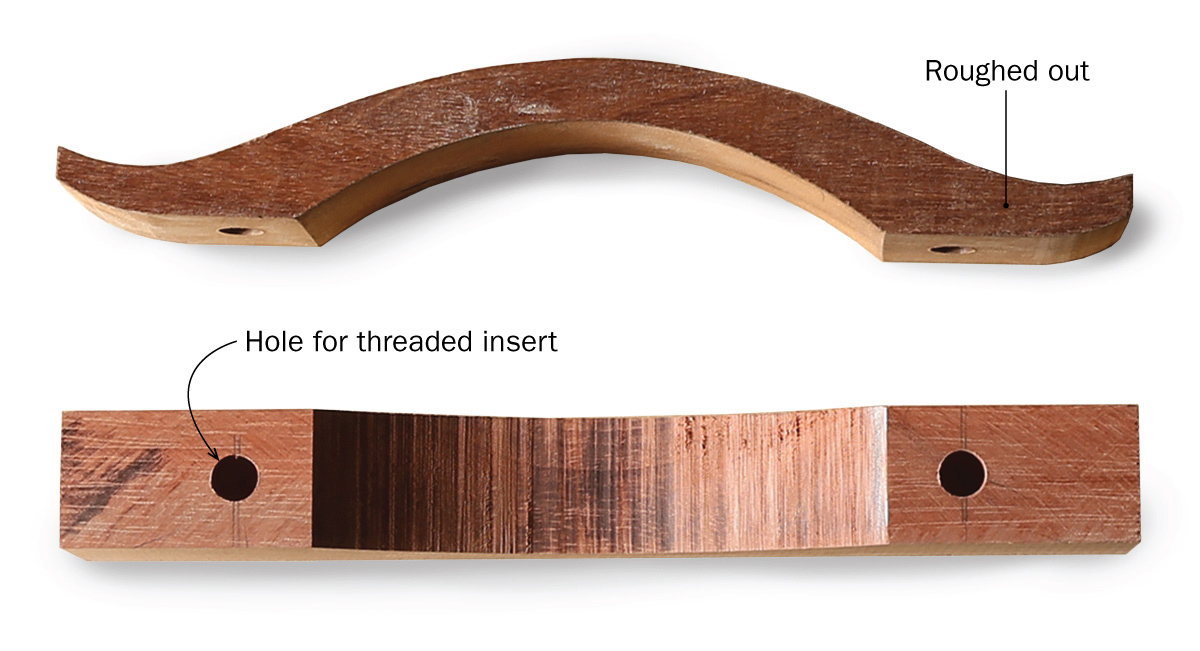
You can attach your handles and pulls with a simple screw from the back without using hardware, or you can use hardware such as threaded inserts.
|
|
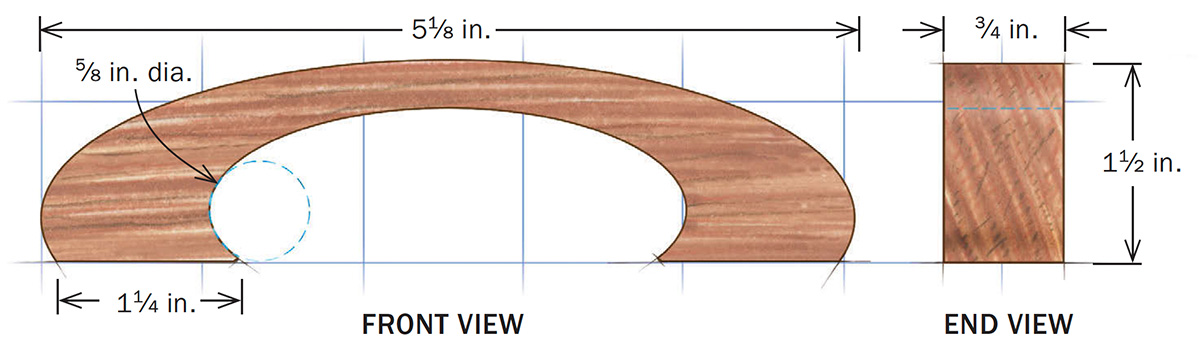
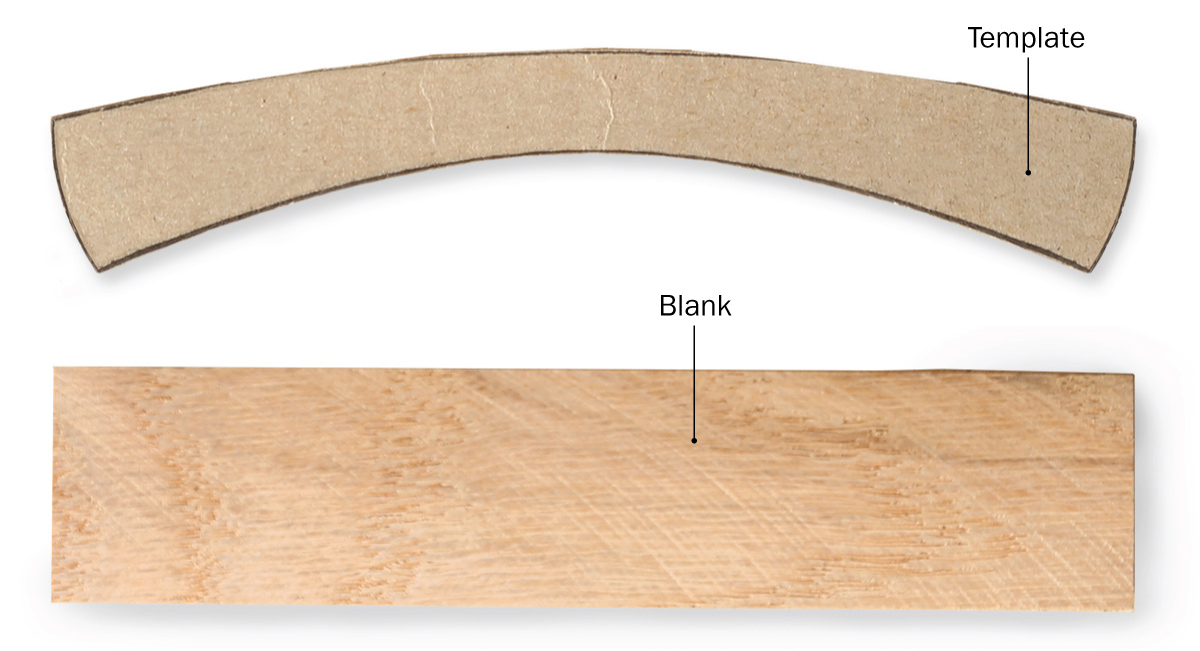
The simplest approach
Screwing from the back of the drawer or door into a pre-drilled hole in the handle is the easiest way to make and attach a handle or pull. And if the handles are too small or delicate to accommodate a threaded insert, it is the only way to do it.
Desoto pull


Yew pull


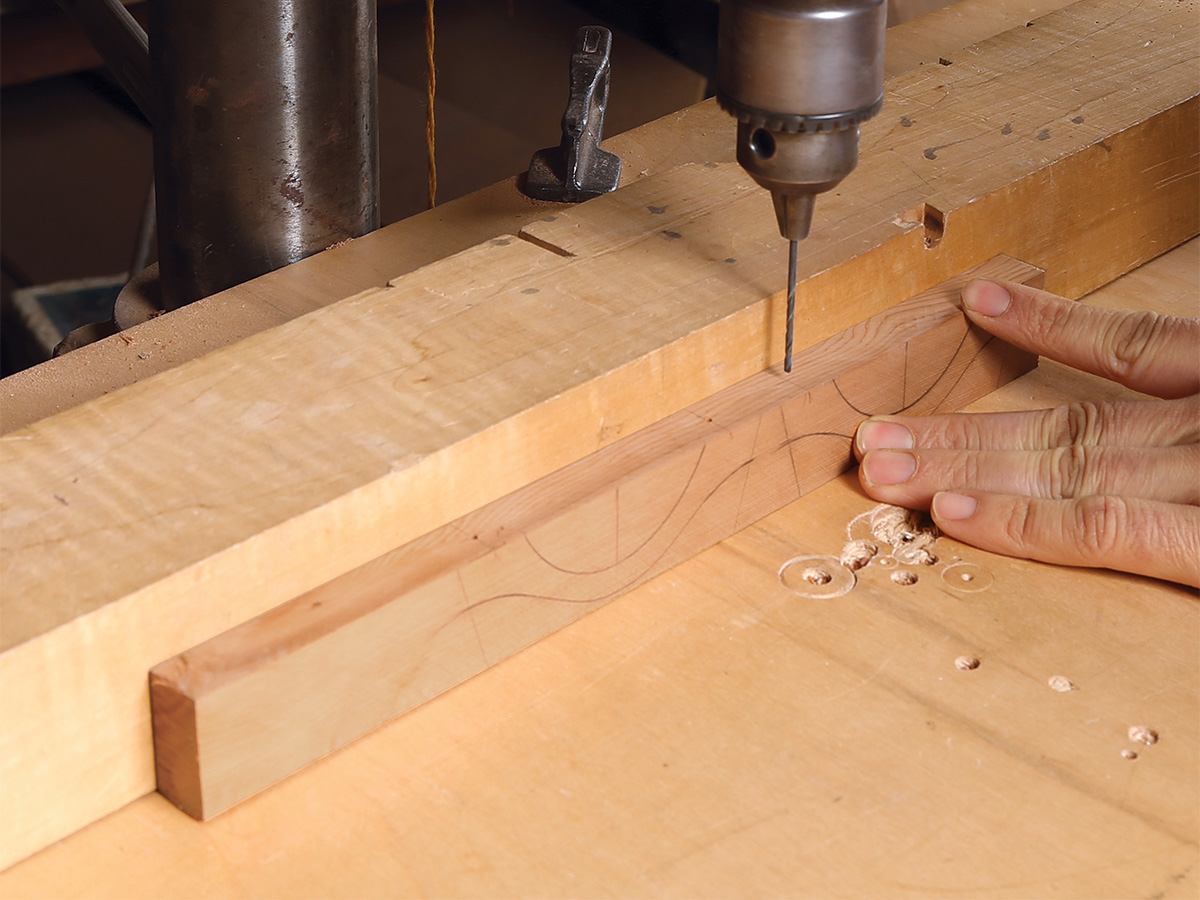

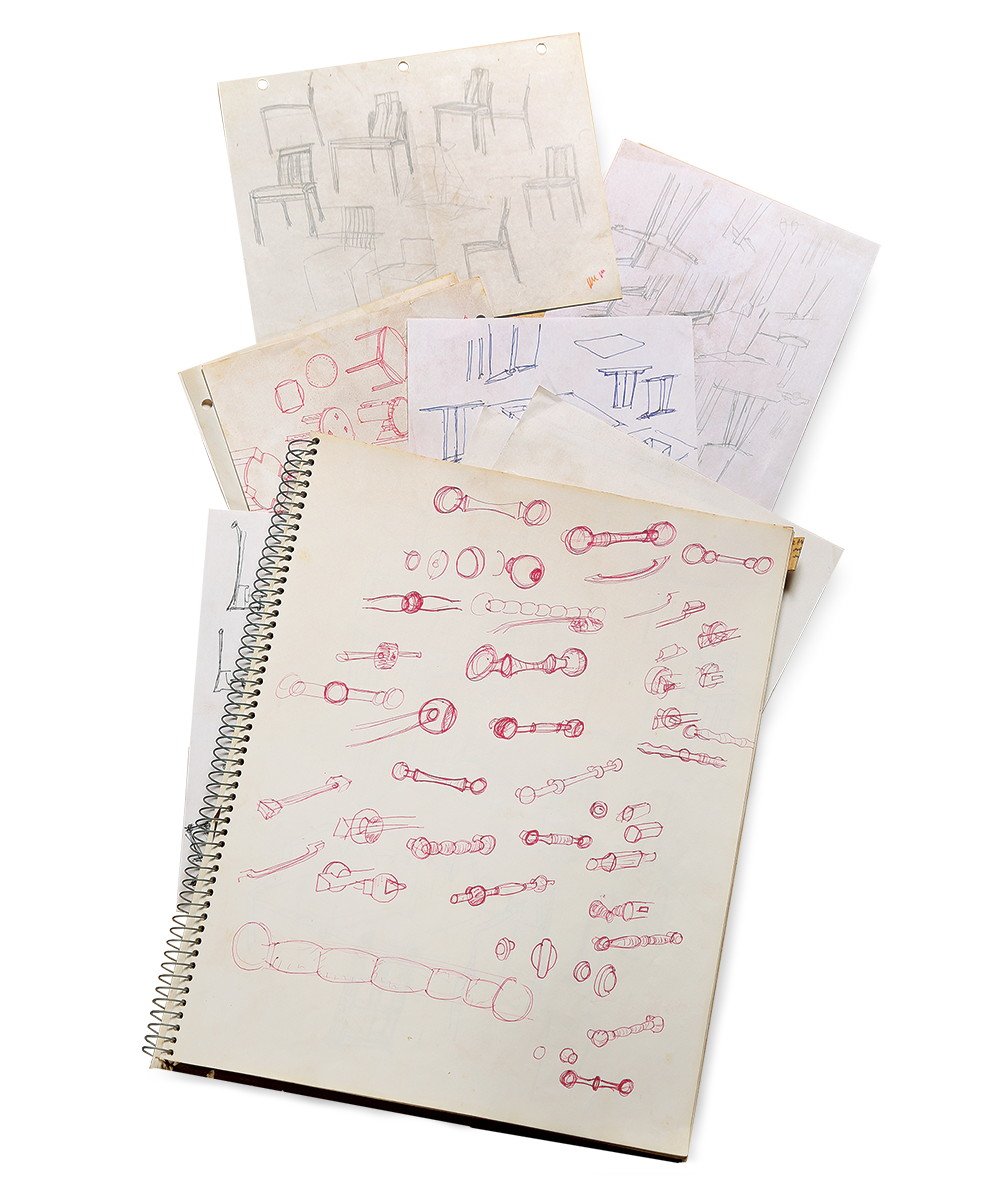
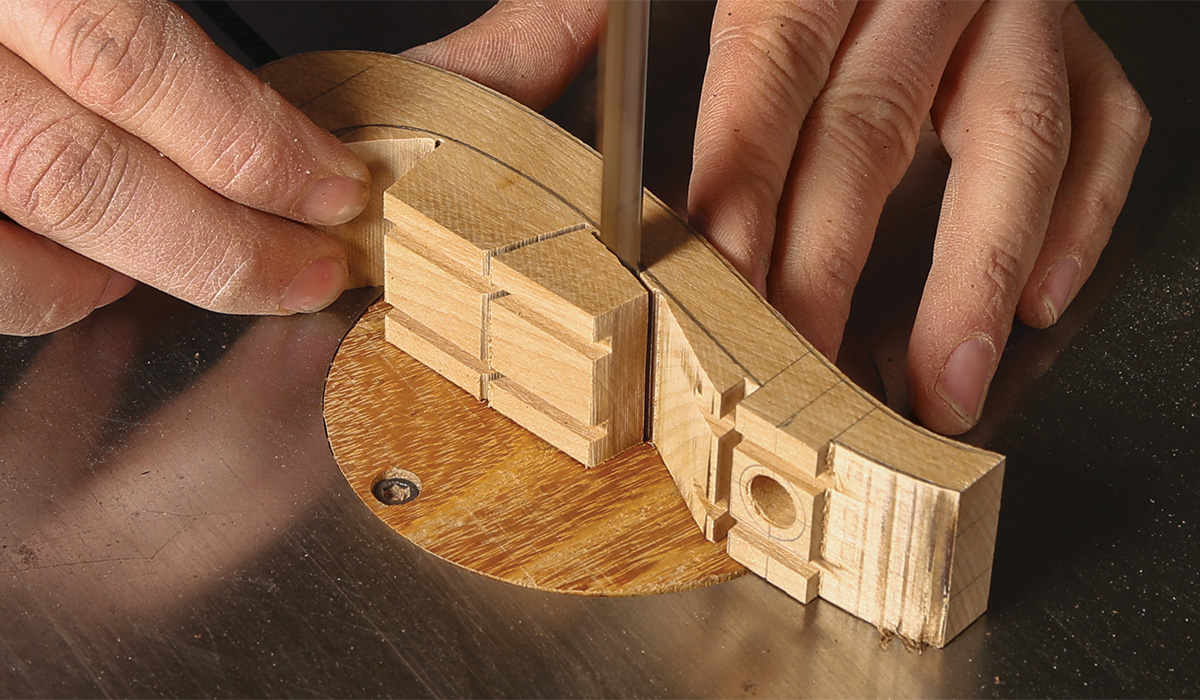
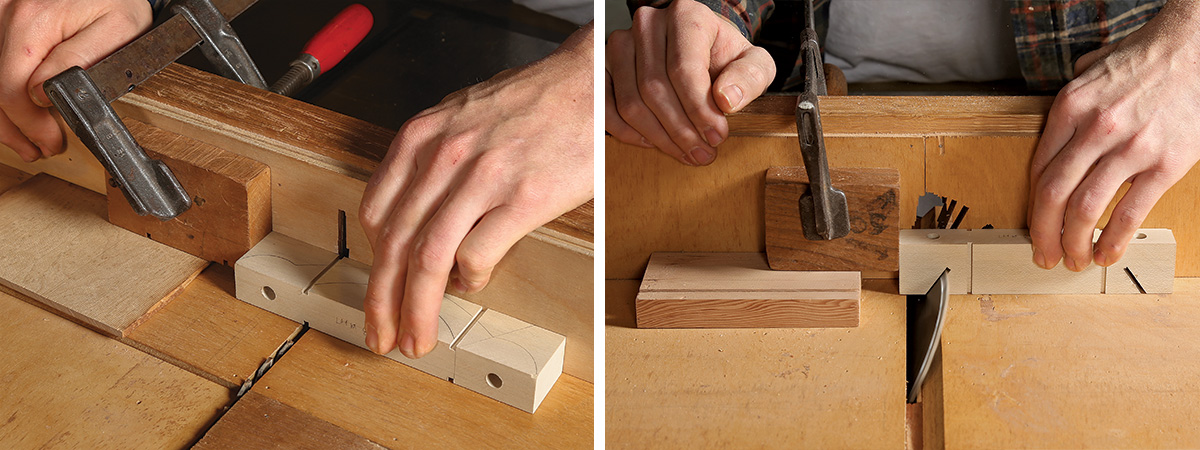
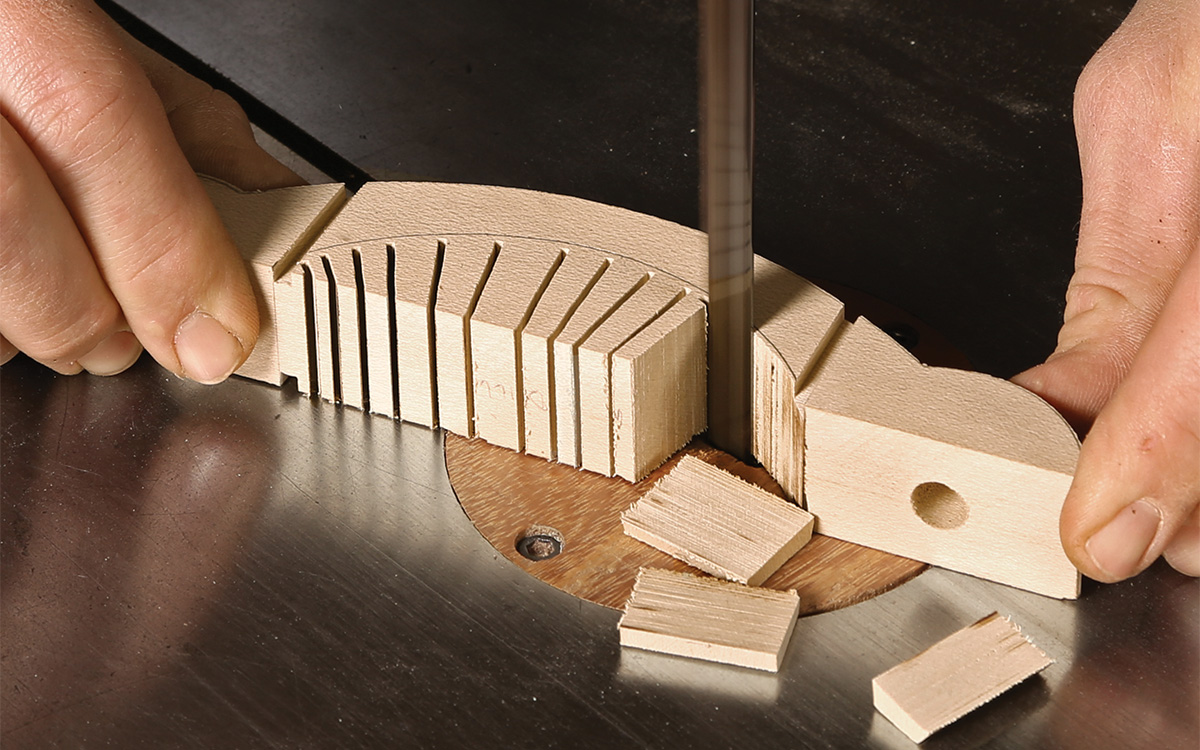
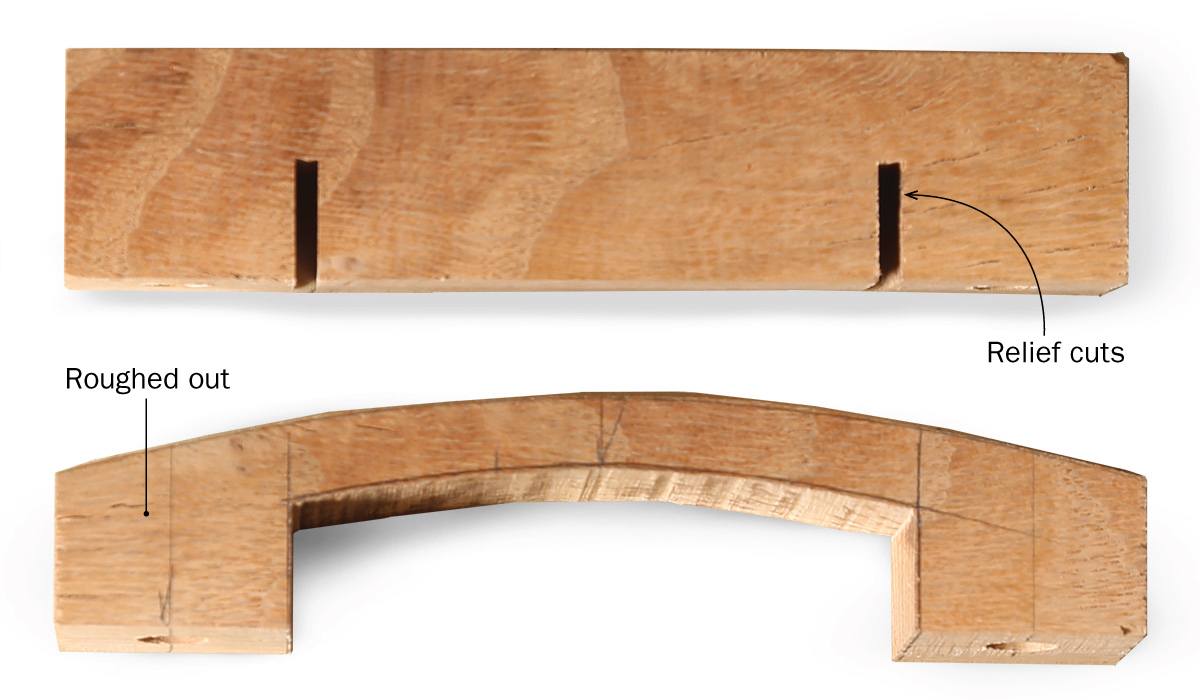
Remember to have fun and don’t feel trapped in traditional shapes. We will sometimes fill five pages in a sketchbook with ideas before we even start to figure out the details of a good pull. There are a few things that are important to keep in mind while designing pulls and handles: What is the construction process? Can I make multiple pulls from a single blank? Can I shape three pulls at once? Can I cut and shape 90% of this pull on a tablesaw before I cut out the handle? Particularly if you have a batch of like pulls to make, the process of cuts and steps involved has to be a key thought. When it comes to making multiple pulls, the more you can do on a machine the better. But always add a little something you can only do by hand!
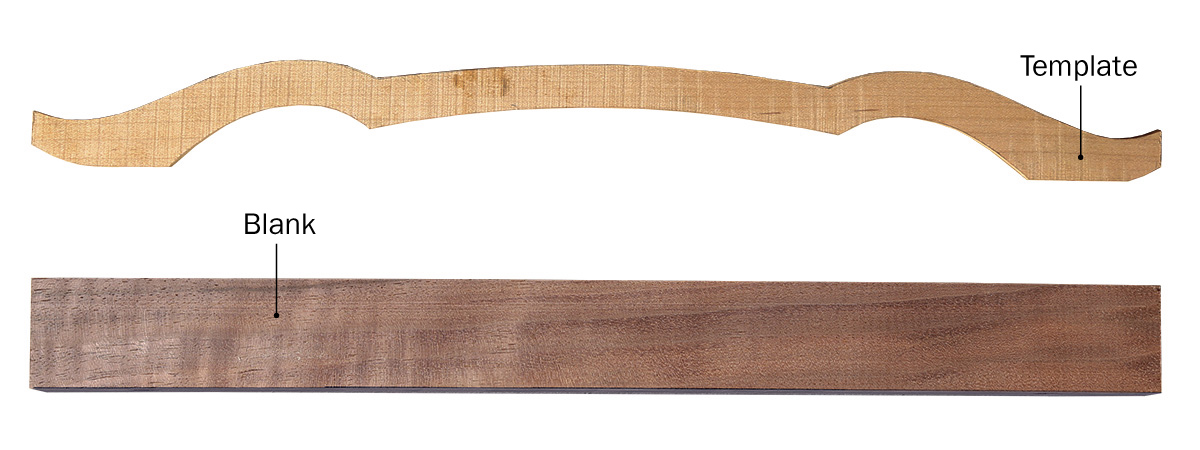
Asymmetry captivates
Nobody ever said handles and pulls must be symmetrical, and this example makes that clear. Reduction cuts, templates, and a bandsaw can get you close to finished.
Vanity pull


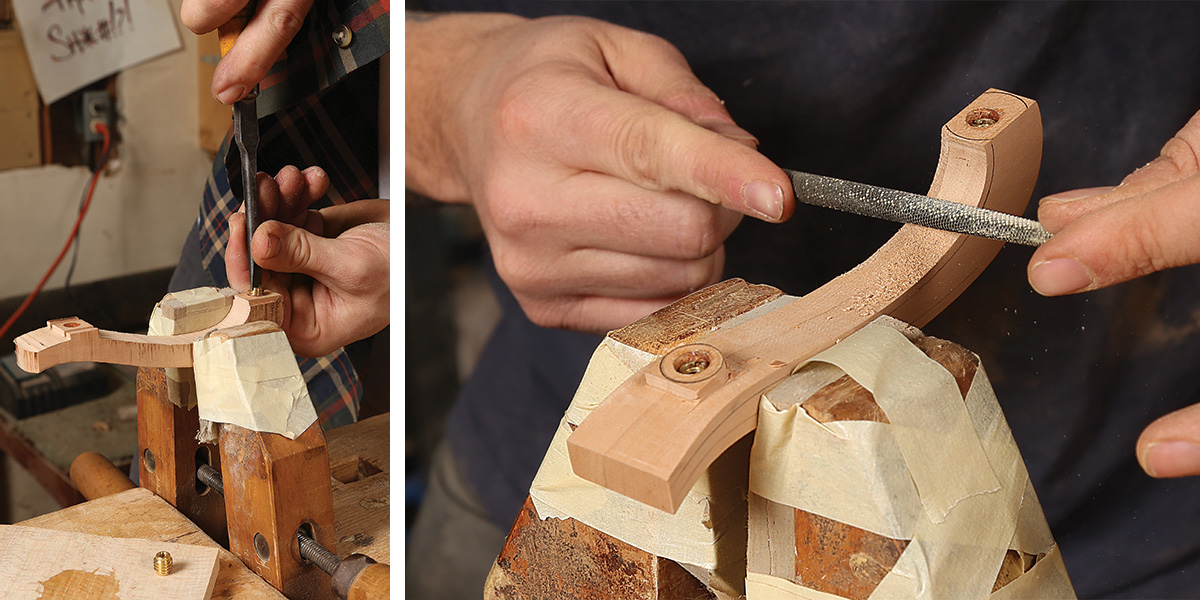
Finessing at the bench – Once the machine work is over, the final stage is cleaning up and refining the shape with hand tools.

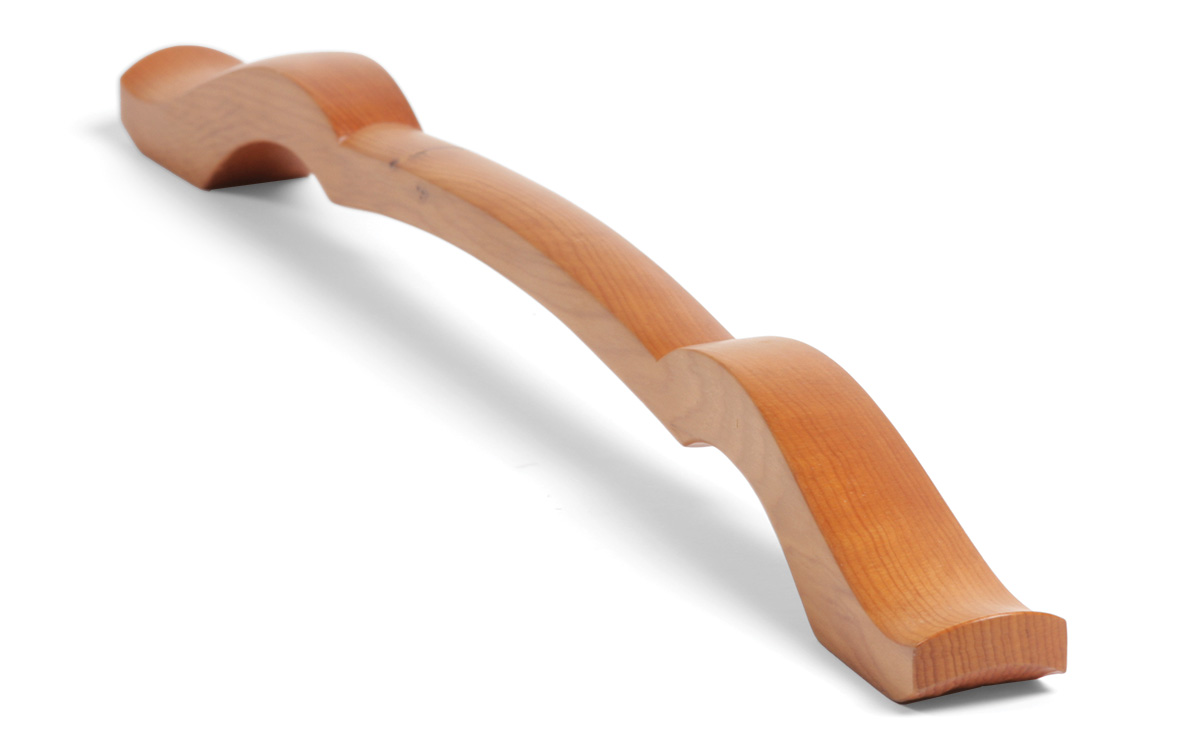
Symmetry with curves and depth
This pull’s complexity and panache derive from tapering curves and a chiseled step.
Blip pull


The main point is to encourage drawing. It doesn’t have to be great drawing. It doesn’t have to be three-dimensional. It can be a whole bunch of silhouettes and simple sketches. Cultivate the creativity that’s generated by drawing and do not be trapped in the first thing you draw. The key is to sit back and let it go. Let it sit. Come back to it. Think about it. Revise it. You’ll know when it’s right.
If drawing your own shapes feels daunting, find something you like and copy it. Do the process a few times. That will be liberating. Then you can get more complex, branch out, and start moving into shapes and ideas that are more experimental. When we design things, the idea is that it should look good, but it shouldn’t scream “look at me, think about me!”
Endless possibilities

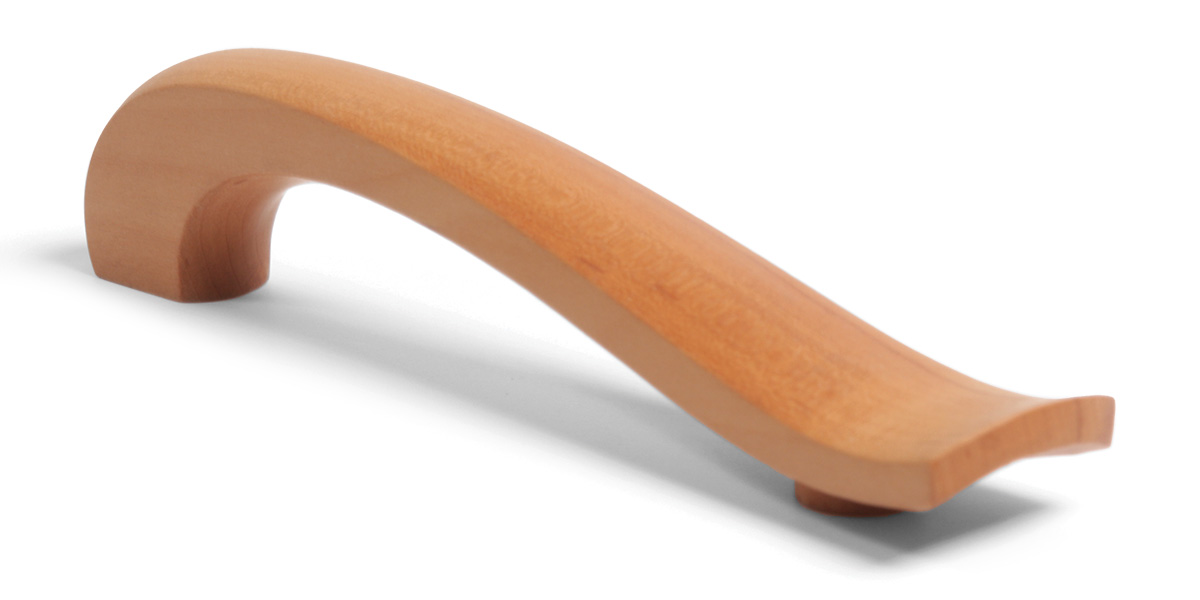
Ribbon pull
The Ribbon pull has become a shop favorite because it has a lot of versatility in its design. Depending on the species of wood chosen and the dimension of stock you work from, the result can be light and graceful or sturdy and robust. We’ve made them in pearwood, Cuban mahogany, sea grape, yew wood, bubinga, and even ipé, which was the largest batch (around 64 pulls). It is an excellent example of hand shaped, tapering crowns. The gouge detail on the underside at the ends is an unexpected bit of handwork, mostly to please the maker as it is not often seen.


Arched pull
The Arched pull becomes playful when you plan several of them on one piece, and you can orient them in different ways to almost make them look like they are different designs, working together in one vocabulary. They are fairly easy to make if you pay attention to the process of bandsaw cuts, and most of the relief shaping is actually on the underside. In short, they look trickier to make than they actually are, and though they aren’t quite as jovial as the bubble pulls, they certainly stand out.

Bubble pull
The Bubble pull is pure fun. Its flashy form brings instant joy. It showcases an immense amount of handwork. This is a case where you could use the pull as a primary detail, a true flair on an otherwise conservative chest of drawers or side table. We first designed these for a row of built-in cabinets, where they played perfectly off floating panels.


Long ribbon pull
The Long Ribbon pull is an extended version of the Ribbon pull we developed to work on larger scale kitchen drawers and doors. We found it was impossible to scale up the Ribbon pull to suit a refrigerator door. It compromised the elegance and felt awkward. We needed to take the Ribbon’s primary element, the symmetrical fanned tails, and elongate them in a way that wasn’t clunky. The transition to the arched middle section was the breakthrough modification and presented another opportunity to showcase some handwork.

Hank Gilpin, Matt Giossi, and Ron Kuhn work in Hank’s shop in Lincoln, R.I.
Drawings: Dan Thornton
Pull template photos courtesy of the authors


