
Synopsis: The edging that surrounds and protects Bruce Eaton’s sunburst veneer tabletop is made of solid wood pieces, fitted to wrap around the perimeter. He employs two templates to ensure that the edging will correctly fit to the table’s outside curve. The ends of each piece of edging are mitered for a gap-free fit.
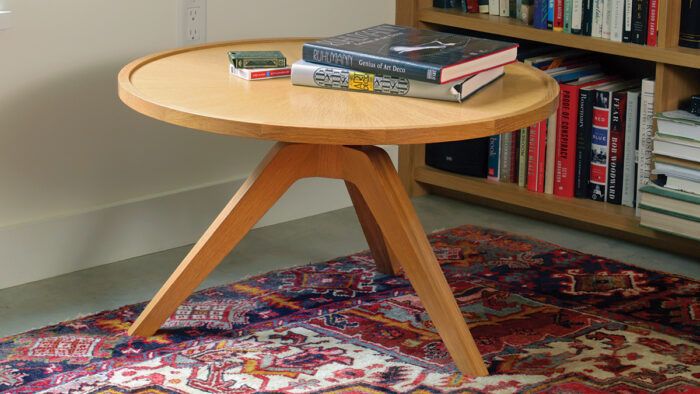
In “Circular Sunburst Veneer Top”, I take you through veneering a round tabletop. A veneered panel needs edging, though, to protect the veneer and hide the substrate. For the table shown here, I wrap pieces of solid wood around the perimeter. On a circular top, this process can feel like a high bar to clear: The edging pieces must be shaped to match the curve of the top, and they’ll be fitted together with multiple miters.
There are two strategies to greatly lower that bar. The first is a straightforward full-size drawing. The second, a sled for template routing, is almost as straightforward, but the path to get there involves a little more ingenuity. It will yield spot-on, fuss-free results, though, without leaving you scratching your head. I’ll show you how to apply edging to my table’s top, using a process that will work on any circle. As an added bonus, the edging will be proud of the table’s surface, creating a lip around the perimeter.
Full-size drawing shows angles

I recommend a drawing for the table’s top veneer in addition to the one for the edging. When you draw out the pieces, you also draw the angles. As a result, the edging pieces, which start out as trapezoidal blanks, are no longer complex shapes with uncertain angles; they’re something you can set your bevel gauge against. The drawing has all the information necessary.
The number of edging pieces can differ from the number of veneer segments. For this table, I milled each edging blank about 3/4 in. wider than its final dimension to let me adjust the arc of the inside curve during construction. While the drawing helps you get to the finish line, there will be some fussing and fitting, especially on the final piece.
This jig’s a two-step

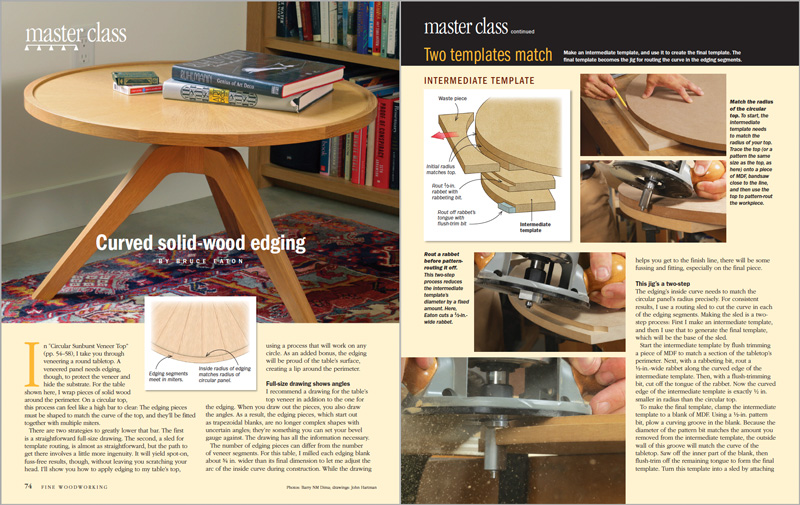
The edging’s inside curve needs to match the circular panel’s radius precisely. For consistent results, I use a routing sled to cut the curve in each of the edging segments. Making the sled is a two-step process: First I make an intermediate template, and then I use that to generate the final template, which will be the base of the sled.

Start the intermediate template by flush trimming a piece of MDF to match a section of the tabletop’s perimeter. Next, with a rabbeting bit, rout a 1/2-in.-wide rabbet along the curved edge of the intermediate template. Then, with a flush-trimming bit, cut off the tongue of the rabbet. Now the curved edge of the intermediate template is exactly ½ in. smaller in radius than the circular top. To make the final template, clamp the intermediate template to a blank of MDF. Using a 1⁄2-in. pattern bit, plow a curving groove in the blank. Because the diameter of the pattern bit matches the amount you removed from the intermediate template, the outside wall of this groove will match the curve of the tabletop. Saw off the inner part of the blank, then flush-trim off the remaining tongue to form the final template. Turn this template into a sled by attaching a fence, two end stops, and two toggle clamps.
Why this two-step process? Because if you were to forgo the intermediate template and employ the same plowed-groove method to make a final template directly from the tabletop, the resulting curve would be off by the diameter of the router bit. But having cut the 1/2-in.-wide rabbet in the intermediate template and then removed its tongue, you can duplicate the table’s curve.
To view the entire article, please click the View PDF button below.
Download FREE PDF


