
Synopsis: A practical and attractive storage piece with roots in British kitchens, this plate rack has a generous area for plates, cutting boards, and other dishes to be stored on their sides, with a shelf above for other items and an arched storage area at the top. It’s a great project for practicing hand-cut dovetails and mortise-and-tenon joints, cove molding, and hanging with a French cleat. You can customize the dimensions to fit your kitchen.
A traditional feature of many British kitchens, plate racks provide practical and decorative storage. The basic form lends itself to customization for mugs, glasses, bowls, and other kitchenware. Plate racks can also be used to hold dishes for air drying over a sink or drain board, in which case you should use a naturally water-resistant oily hardwood such as teak for all parts that will get wet.
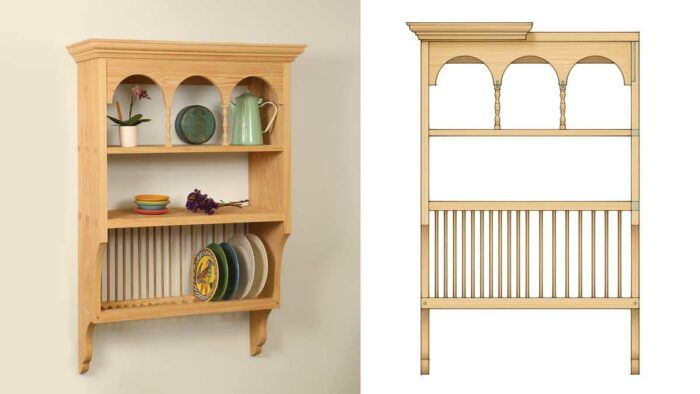
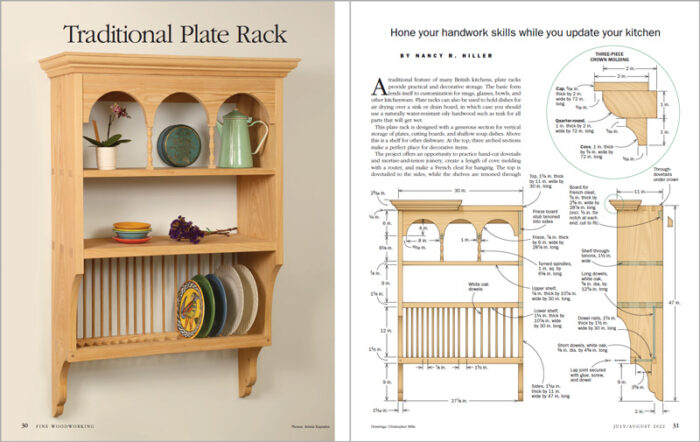
 This plate rack is designed with a generous section for vertical storage of plates, cutting boards, and shallow soup dishes. Above this is a shelf for other dishware. At the top, three arched sections make a perfect place for decorative items.
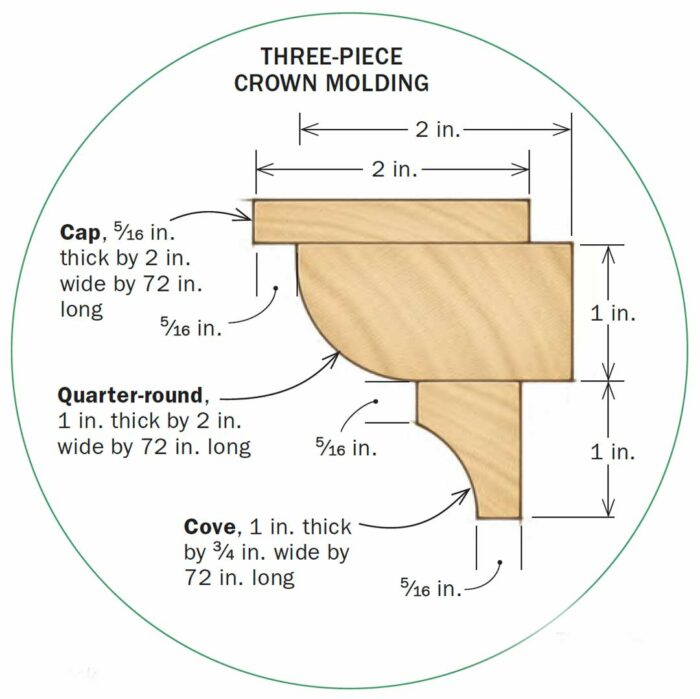
The project offers an opportunity to practice hand-cut dovetails and mortise-and-tenon joinery, create a length of cove molding with a router, and make a French cleat for hanging. The top is dovetailed to the sides, while the shelves are tenoned through
them, and the dowel rails are fitted into notches. It is also an exercise in accurately laying out and drilling holes for dowels, and incorporates a lesson on the importance of factoring in some play in the vertical fit of dowels to allow for stress-free assembly.
Customize the layout to your dishes
Plate racks are simple forms, but to do their job successfully, they require careful planning. If you intend to customize your rack to fit your dishes, you should mock up the relevant sections in scrap material to make sure you get the spacing right to ease moving things in and out.
To ensure that plates and shallow bowls are stable, the spacing between dowels should be as narrow as possible while still allowing the dishware to pass between them without getting stuck. This is especially important if you plan to add a row of vertical dowels at the front, as some designs call for.
The distance between the front and back dowel rails will also affect how well the dishes are supported. The plates should drop down into the space between the rails to keep them from rolling out of the rack. But the space between the rails can’t be too large, or smaller plates will fall through. Be sure also that there is enough clearance between the top of your largest plate and the shelf above that you can lift the plate over the front dowel rail as you pull it out.
Lay out and cut the joinery
Start with the dovetails that join the sides to the top. Set a cutting gauge to a hair more than the thickness of the top and mark this as the baseline at the tops of the sides. Next, set the cutting gauge to a hair more than the thickness of the sides and transfer this dimension to the ends of the top.
The through-tenons will be laid out with the same setting, so after you’ve gauged those baselines for the dovetails and pins, mark the same measurement on the ends of the shelves and dowel rails. Even though the dowel rails will not be tenoned, but instead let full-size into notches, it’s helpful to have these “shoulder” markings when you lay out the dowel positions.
Lay out the tails with a dovetail template and cut them, then remove the waste with a coping saw and chisels. Decide which end of the top to cut first, and place it in the vise, inside face toward the bench. Set its mating side on the end to transfer the tails onto the pin board, then cut the pins with saws and chisels.
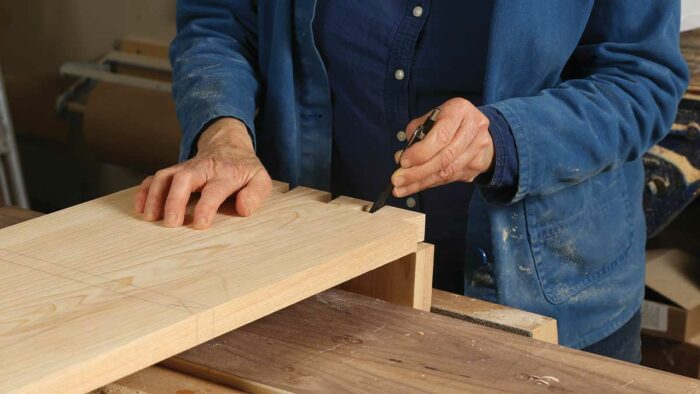
Next, lay out the locations of the through-mortises and notches on the sides. I start with the vertical marks, then move on to the horizontal ones (referencing from the back edge of each side). Mark the outside faces of the sides first, then transfer the relevant marks to the inside face with a square and gauges. Mark the locations in pencil first, then use a knife to score across the grain and a marking gauge to define the edges of the mortises and notches that are parallel with the grain.
An abundance of joineryThis case is a practice piece for joinery options. The top and sides come together with through-dovetails, the shelves are secured to the sides with through-tenons, the dowel rails fit into notches, and the decorative frieze is joined to the sides with stub tenons into grooves. Hiller makes quick work of it all, mostly by hand. Dovetail the top to the sides 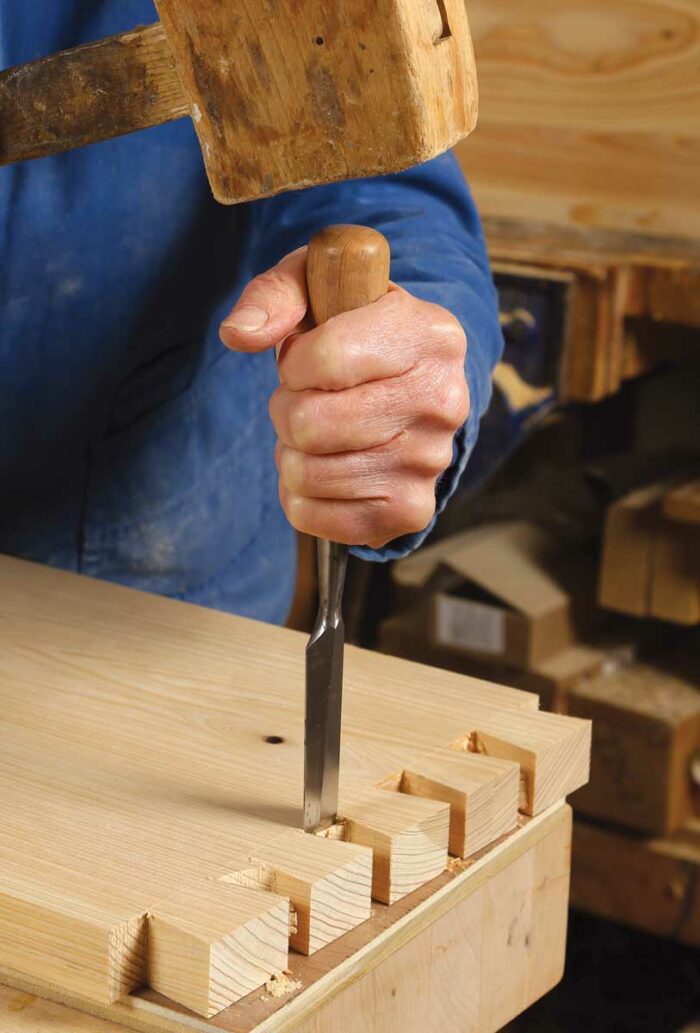 
|
 From Fine Woodworking #297
To view the entire article, please click the View PDF button below.
Download FREE PDF


