
Predominantly, my sources for furniture reproduction are photos. Most of the time I find these photos in books and on museum websites. Occasionally, the photos are from woodworkers using iPhones or equivalent. Recently, one of my students sent me several photos of a child’s rocking chair. This was a family heirloom and the student was anxious to start a reproduction. However, rocking chairs are difficult, with lots of shaped and turned components connected at irregular angles. So I was asked to create the SketchUp model with its attendant detailed, dimensioned, and annotated Scenes, including full-size templates.
The student provided a number of photos at various angles, some close-ups and others of the complete rocker. SketchUp comes with two ways of handling photos—the simple “Import” and the more sophisticated “Photo Match.” As there are no right angles in rocking chairs, the Photo Match option will not work. Therefore, my only option was Import. I could import the existing photos, but none were ideal for capturing shapes, angles, and sizes. They were taken at various angles (not straight-on or perpendicular to surfaces) and rather close with lots of perspective. Ideally, you would like Orthographic-like pictures Top, Front, and Side views.
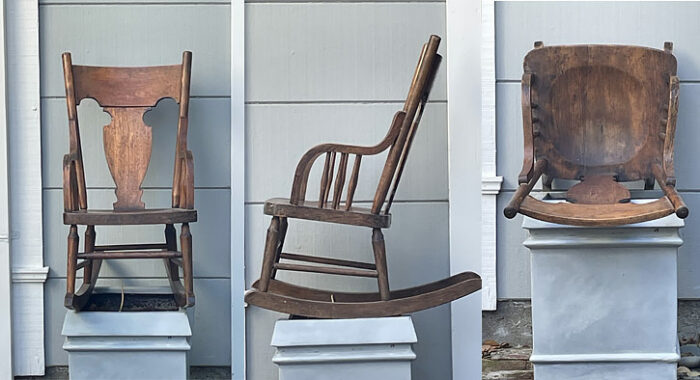
These were ideal for the next step in capturing the shapes and sizes of components in SketchUp. After aligning these to the SketchUp red, green and blue axes, and sizing them full size, I was ready for the trace over of the components.
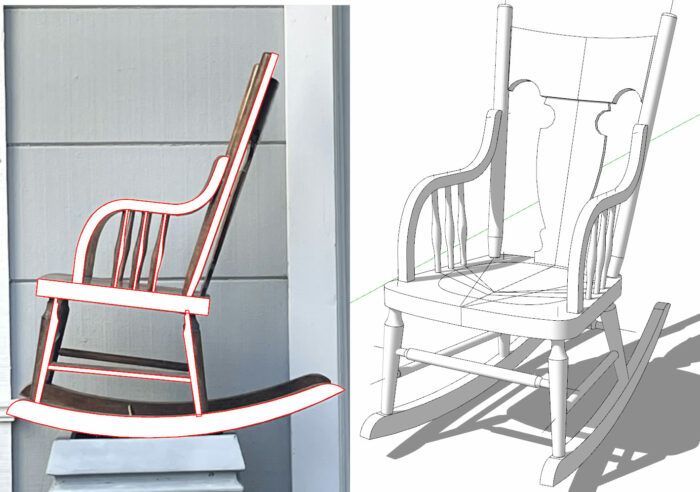
Above is an example of my trace over for the Side View. I don’t do the turnings at this stage, just create the half profiles as you can see for the spindles and stretchers.
Here is my current model with the rough components. There is much more to be done—creating all the component detailed dimensioned Scenes, and the joinery. I have worked out Sighting Lines on the Seat for drilling angles.

 |
Adding phantom lines in SketchUp |
 |
Creating complex curved faces in SketchUp |
 |
Multiple SketchUp views for help in the shop |


