
Synopsis: The use of rye or wheat straw in place of wood veneers to create marquetry patterns on furniture has been around for centuries. Straw marquetry, as it’s known, uses split and flattened straws applied in the traditional way to embellish wood surfaces. The practice involves some different types of tools and techniques, and the results can be stunning. Learn how to do it with these instructions from Gerard Williams.
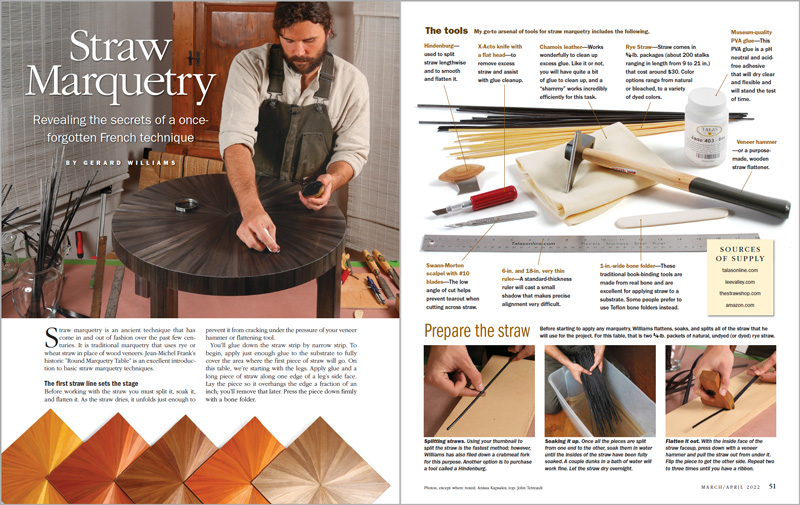
Straw marquetry is an ancient technique that has come in and out of fashion over the past few centuries. It is traditional marquetry that uses rye or wheat straw in place of wood veneers. Jean-Michel Frank’s historic “Round Marquetry Table” is an excellent introduction to basic straw marquetry techniques.

The first straw line sets the stage
Before working with the straw you must split it, soak it, and flatten it. As the straw dries, it unfolds just enough to prevent it from cracking under the pressure of your veneer hammer or flattening tool.
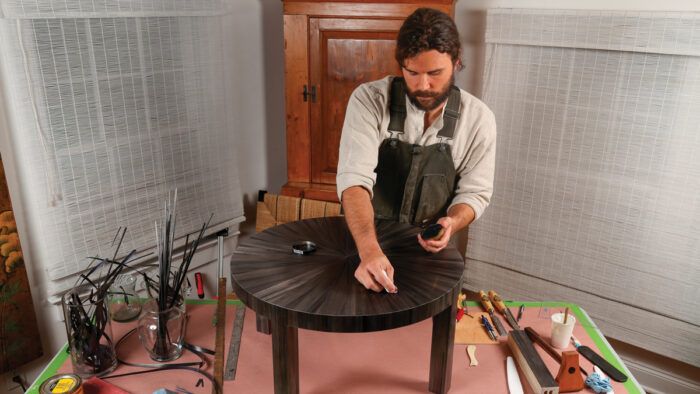
You’ll glue down the straw strip by narrow strip. To begin, apply just enough glue to the substrate to fully cover the area where the first piece of straw will go. On this table, we’re starting with the legs. Apply glue and a long piece of straw along one edge of a leg’s side face. Lay the piece so it overhangs the edge a fraction of an inch; you’ll remove that later. Press the piece down firmly with a bone folder.
Then take your longer ruler and slice a straight line from top to bottom, parallel to the edge of the leg. Do not remove the ruler after slicing. Leave it in place and reach for the flat X-Acto knife. Referencing the edge of the ruler, peel away the excess straw with the knife. The next piece of straw will butt against this edge you’ve created. Finally, use the scalpel to remove the straw overhanging the edge of the leg. 
Apply more glue and place the next piece of straw as close as possible to the line just cut. With your fingers barely overhanging the edge of the straw, pull it over and you will feel it butt up against the straw that’s already been applied. This process is tactile, not visual. If you can’t feel the straw sort of lock into place, it is unlikely to be accurate. Repeat this process until you’ve covered the rear and side faces of all four legs.
Assemble and cover the front of the legs and apron
Next you’ll assemble the table, and use a handplane and sanding block to shape the square front of the legs to match the gentle curve of the circular top. Then apply straw to the outer face of each leg and the apron above it.
When you finish the legs, move on to the apron sections between the legs. When cutting overhanging ends of straw pieces flush with the substrate, focus on slicing down. If you just pull the scalpel across the straw it will tear out.
Once the legs and aprons are completely covered and the straw is all trimmed flush, do a final sanding with a sanding block, pushing toward the center of the table.
 From Fine Woodworking #295
To view the entire article, please click the View PDF button below.
More like this
Download FREE PDF


