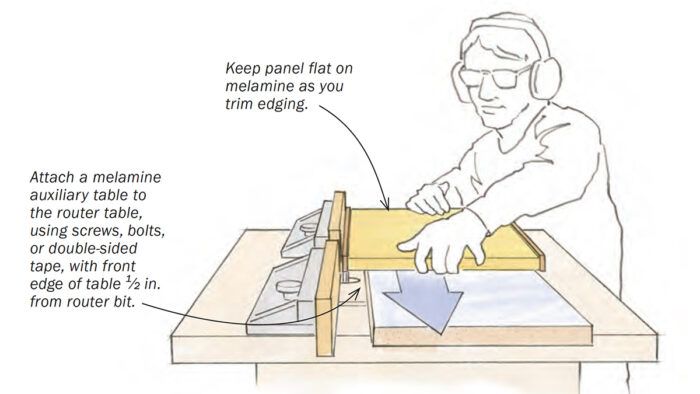
Trimming solid edging on plywood is a tedious task, especially if you have a lot of shelves and cabinet edges to process. I know the magazine has offered a number of good solutions, but the following is the favorite by far in my pro cabinetry shop. The setup is simple, and works on either a router table (with the user feeding parts by hand) or a shaper equipped with a power feeder.
Start by loading a straight bit in the router (or equivalent shaper cutter). A 1/2-in. bit will work for thin edging, but bigger is better. Then attach a melamine auxiliary table on top of the existing table, using double-sided tape, or better yet, using screws, or T-slots and bolts, to make it easier to attach and detach. Set the table 1/2 in. or so away from the bit, to leave room for overhanging edging on the bottom side, as well as any glue squeeze-out there. Last, set the fence to position the outside of the cutter under the edging you are trimming, and raise the bit until it’s 1/32 in. to 1/16 in. shy of the top of the melamine table. Keep your panels flat on the melamine as you trim the edging, and the job will go quickly, with great results. A climb cut, moving left to right, will give the cleanest results, but a right-to-left cut will be easier to control.
This setup will leave a sliver of edging to be block-planed and sanded away in short order.
—STEVE LANN, Hyattsville, Md.
Illustrations by Dan Thornton
From Fine Woodworking issue #296


