Recently, I was meandering around one of my super secret lumber suppliers. I always enjoy flipping boards; you never know what you’ll find. Anyway, I lifted up a tarp covering what I presumed to be a pile of trash around back. To my surprise, I bumped into a particular board that spoke to me. It was a short but wide piece of walnut. Right in the middle was a bark inclusion; there was also some live edge, sapwood, and a couple of small checks. But the board was 49 in. long and 18 in. wide. To quote Smee from the 1991 movie Hook, “lighting struck my brain” and I had the unfamiliar experience of having an actual idea. This piece of wood needed to be turned into a coffee table.

So I rescued the piece from the pile, brought it home, and got right to work. The timing was fortunate because I had about a five-day gap in my schedule where I had planned to edit my backlog of unedited videos. But cranking out videos in an attempt to feed the algorithm beast is boring. I put that nonsense on hold and got to work.

I rarely get to design and build a project without input from a customer. Needless to say, I was excited to get going. I liked the shape of the top even though it was asymmetrical, so I wanted to keep as close to that shape as possible. I cut only what was needed off each end and cleaned up the two long sides. I’m not a big fan of poured epoxy, but in this case it was necessary as the bark inclusion was loose.

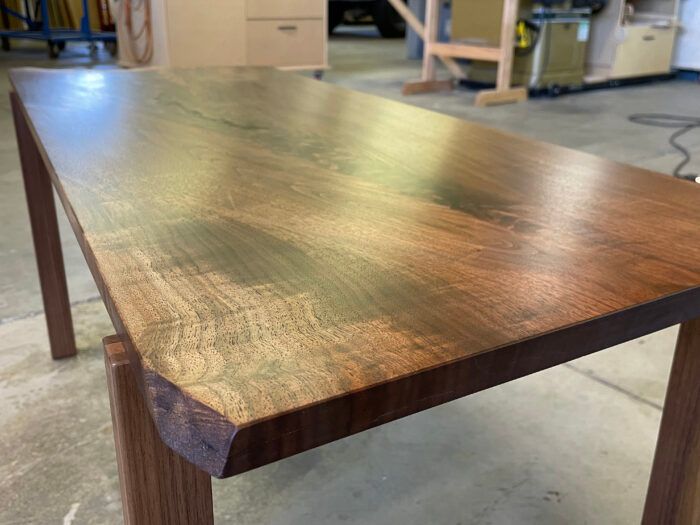
Being a “less is more” kind of guy at heart, I wanted a simple base. Straight legs, with bridle joints at the corners, are connected to each other with two stretchers. I kept the stretchers closer to the outside of the table in an attempt to add a little thickness. The top ended up being exactly 3/4 in. thick after flattening, which is a little thinner than I would prefer for a table of this size. I also recessed the legs into dadoes and made them a little wider than the top. This is a detail I have used on several pieces of furniture over the years. I really like it; it shows off the bridle joints and shows that some thought was put into how the top is attached to the base. The only other detail is a butterfly key securing a small check. The finish is Osmo, applied in a wipe on/buff off fashion, three coats on everything and four on the top.

Overall, I am happy with the table. My goal was to hit a balance between allowing the wood to be the design, while not being too sterile. The top will grab one’s attention and the small details I added will hopefully hold it. This was a blast to build, and as mentioned earlier, it fit nicely into a gap in my schedule.


This is a spec piece of furniture. I will try to sell it via social media, or maybe shop it to a few local galleries. This build will eventually be a video on my YouTube channel, if I ever make time to edit. Thank you for reading. I’d love to hear your opinion on how I did.


