In this article I’ll describe the relatively simple method I used to make the nautical inlay for my “Anchor Chain” hammer. Adding inlay to hand tools is a great way to practice inlay techniques or to simply add a touch of class to your workshop. I add inlay to both sides of a hammer handle and sometimes, I vary the inlay on each side so the patterns complement each other. Before starting the inlay process, the hammer handle should have its final coat of oil finish.
Fit the blank
The first step in creating the round inlay is to select a blank for the outer ring of inlay. Holly is a great option for a dark hammer handle. Turn the holly blank to the diameter of a Forstner bit. While turning the blank, periodically stop the lathe and check that the blank’s diameter fits into a 1/2-in.-deep test hole, drilled in a scrap of wood. The holly blank will be used to make two 1/4-in.-thick pieces of inlay, so make sure the blank’s diameter is correct up to about 1/2 in. along its length. The better this fit is, the cleaner your inlay will look when it’s glued in place.
Drill the hole
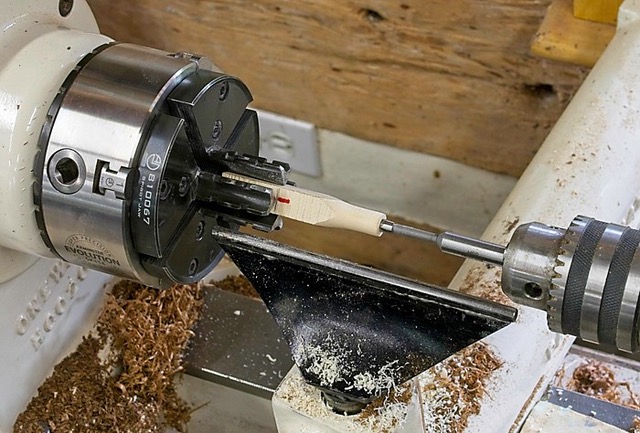
Next, select a drill bit to drill the hole for the contrasting wood in the center of the inlay. To drill the hole, leave the holly blank on the lathe and put the small Forstner bit in a drill chuck mounted in the tailstock. Start the lathe and drill a hole about 1/2 in. deep. The hole can also be drilled on a drill press or even using a hand drill with the holly blank held securely in a vise. Regardless of the method used, the key to centering the colored wood in the holly blank is to start drilling with the tip of the Forstner bit resting in the small hole made by the point of the lathe’s live center.

Contrast the infill
Now it is time to make the contrasting infill for the nautical inlay. I chose a light green wood but when I oiled the hammer handle, the green wood darkened considerably and it looked almost black. Always test your inlay woods with the finish to be used to avoid a similar disappointment.
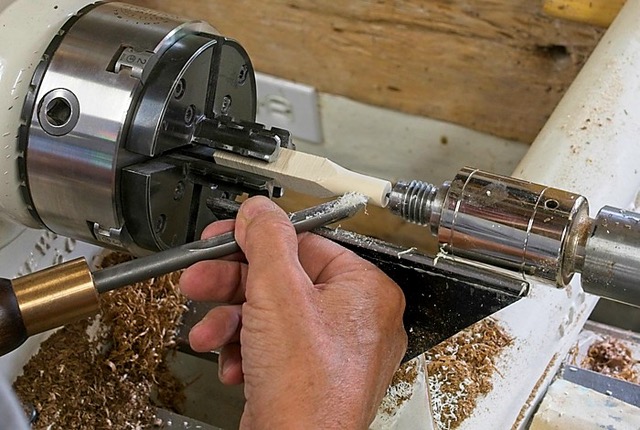
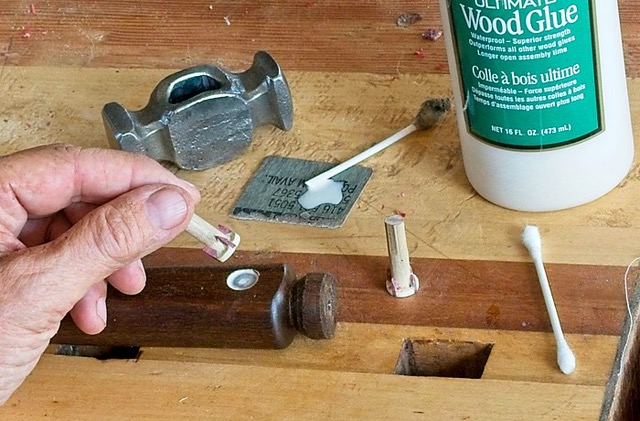
To utilize just a small piece of colored wood, glue a 1/4-in.-thick piece of the contrasting wood to a dowel first, let the glue dry, and then turn it to size on the lathe. The contrasting wood must be the exact diameter of the small Forstner bit used to make the hole in the center of the holly blank, so stop the lathe and test frequently for a snug fit.
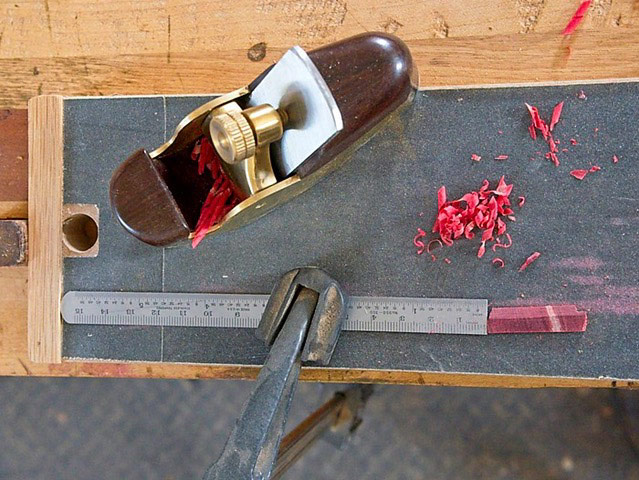
To create the contrasting X pattern for the inlay, I chose a red-colored wood and planed it to the thickness needed. To plane small pieces I use a board with sandpaper glued to the surface and a very shallow planing stop glued across one end of the board. In this case the red-colored wood was too thin for the planing stop so I used a ruler as an additional planing stop. Feel free to use whatever method works for you to make small contrasting pieces.
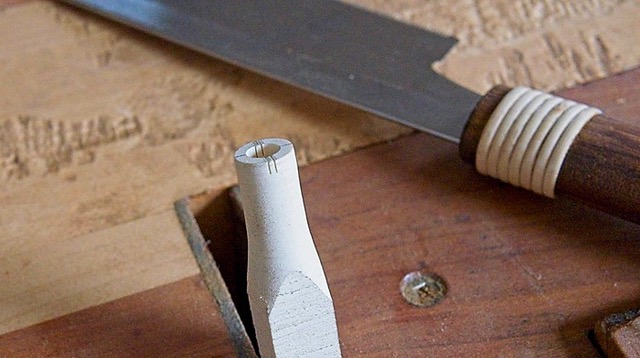
To prepare the blank for the contrasting inlay, first mark the area to be cut by holding the red-colored wood in place and scribing on either side of it. Then, cut to the line with a fine handsaw, down about 1/4 in., and break away the waste pieces with a fine chisel.
Glue the inlay
It is finally time to make the two pieces of nautical inlay—this will be accomplished in two stages. The first piece of inlay will be assembled and cut away from the blank leaving enough material to cut new notches again (for the red inlay) and to repeat the whole process a second time.
To make the first piece of inlay, glue the inner green inlay in place and then fit each of the four red pieces of inlay in the slots around the outside of the blank. If the red inlay doesn’t fit tightly, use some shavings and glue to pack the void for a tight fit.
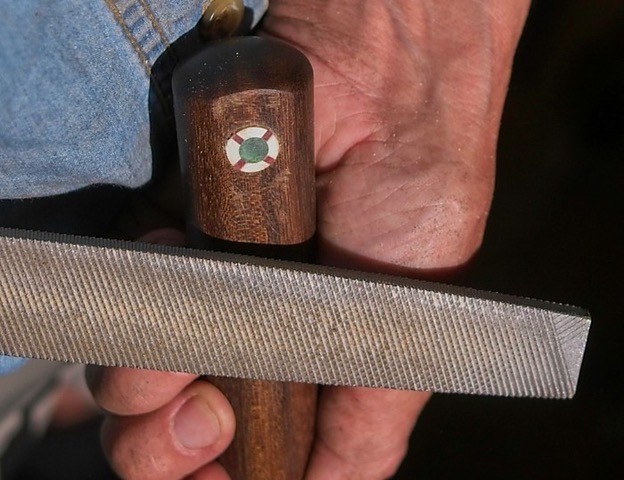
Wait 30 minutes for the glue to dry and then file the red inlay flush with the outside diameter of the holly blank. To be certain of success in the filing process, make a pencil mark on the holly blank right beside the red inlay and when a fine file begins to remove the pencil line, the red inlay will be flush.
Sand it down
When the glue is dry on the first piece of completed inlay, cut the 1/4 in. of finished inlay off the holly blank. The colored woods on the bottom of the completed inlay piece may need to be sanded flush. To do this quickly with a spinning sander, hold the inlay at right angles to the sandpaper using the dowel as a grip, until all the colored woods are flush. Now, to make the second piece of inlay, repeat the entire process by starting with the cutting of new notches for the red inlay.

Set it in place
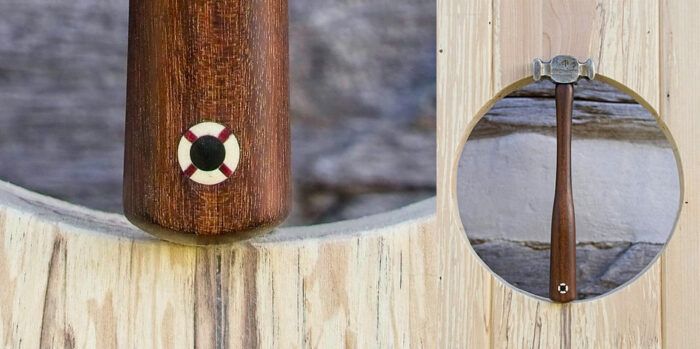
To install the nautical inlay, use an awl to mark the center of the inlay location on the hammer handle. Place the tip of the Forstner bit in the divot made by the awl and drill a 1/8-in. hole into the hammer handle. Before putting glue in the recess, seat the inlay in the hole and rub wax around the inlay and the hammer handle using a Q-tip. This will protect finished surfaces against glue squeeze-out. With that done, remove the inlay, put glue in the hole, and set the inlay in for final time. Next, carefully cut off the dowel and firmly seat the inlay in place with a clamp.
File until it’s flush
The last step is to file the inlay flush. For a nice, domed button feel, you can file the inlay almost flush and then feather the edges of the inlay with fine sandpaper. Finally, apply wax or an oil finish to the inlay and your hammer is ready to adorn the shop wall.