A few years ago I made a disc sander attachment for my lathe. I had seen a similar attachment on Tim Rousseau’s lathe, and I thought it might come in handy every now and then. Soon after I found myself using my disc sander attachment quite frequently and it honestly left me wanting. The lack of a miter gauge was problematic, and the 6-inch disc just wasn’t big enough for me—even though I say on video that both wouldn’t likely be a problem.
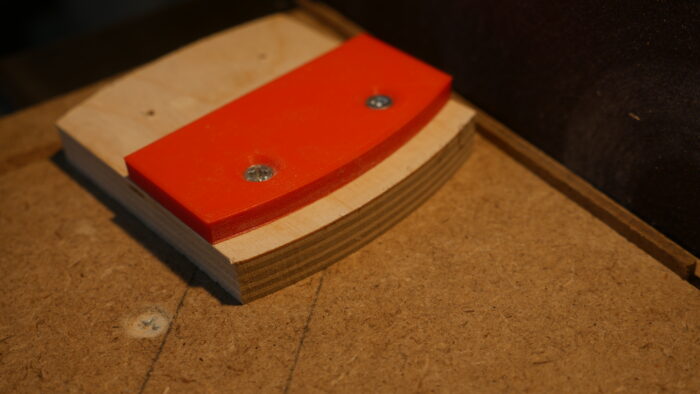
The heart of the disc sander flushing jig

This jig works thanks to an auxiliary table that practically lives on my disc sander. The table has a piece of wood to fit in the miter gauge and there is an 1/8-in. groove cut into the front edge of the table. The table is almost flush to the disc platen. This makes the sander safer in every day use since it’s less likely that it will grab a small piece and pull it down into the gap between the sanding platen and table.
The groove next to the edge accepts an 1/8-in. piece of hardboard. When this small scrap is inserted into the groove, it acts as a fence for my sanding jig.
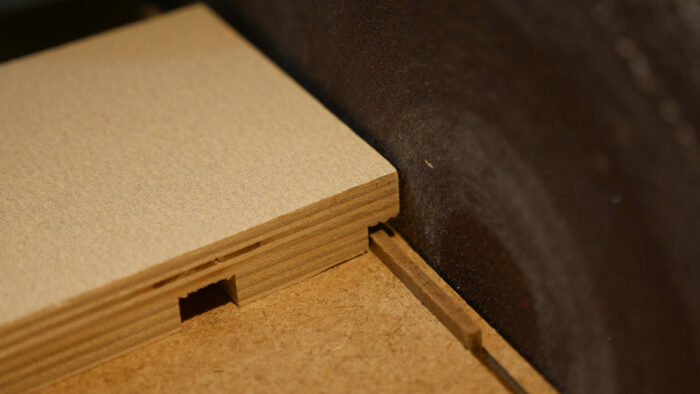
Since the fence registers against a rabbet cut into the jig, the jig isn’t able to move past a certain point and you wind up with a perfectly consistent and flush edge on the jig. Once you clamp a piece of wood on the jig anything hanging over the edge of the jig will get sanded flush to the edge on the disc sander.
The same concept works on convex curves as well. If you’re like me, and stickler for perfect measurements, you can 3d print templates. Be sure to factor in the offset of the fence. For instance, my fence wound up being .325 in. from the sanding disc. So if I want a 10-in radius, I print a template with a radius of 9.675 inches.