Want to make sure your joinery fits well? One of the most important ways to achieve this starts with accurate work when laying out the joint. If the layout is sloppy, then there is good chance that the joints you cut will not line up the way you like. There are many factors to a successful layout, so let’s start with the numbers.
Measuring can definitely cause issues when you are laying out a joint. A simple math error or using the fraction 5/16 instead of 5/32 can spell disaster. Using the metric system, or at the very least using decimal inches can help reduce fraction errors. Math aside, there are ways to help you work more accurately when laying out dimensions.
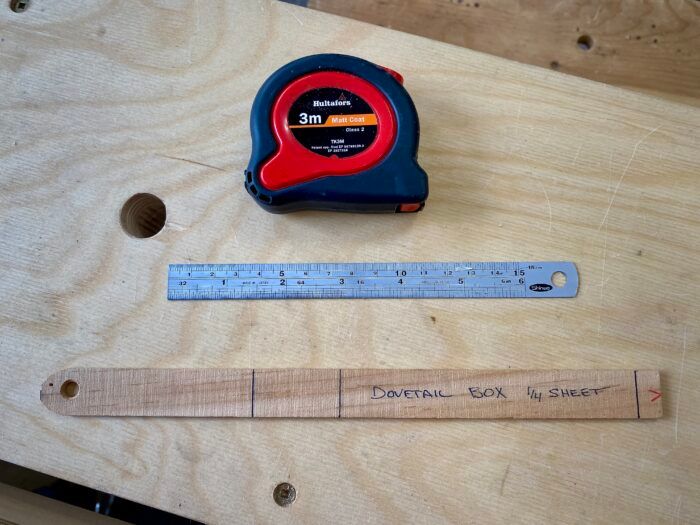
My measuring tools are separated into three different classes: coarse, medium, and fine. What puts them into these classes are two questions: how accurate do I need to be and how easily I can get the results I need?
Coarse
Measuring tapes are the primary tool in this class for me. Depending on the quality, tapes can work well for initial layout. I use them primarily at the outset of a project both at the lumber store when buying wood and in the shop when bringing materials to rough length and width. Once the lumber is roughed out, the tape gets put away and the next level of tool comes out.
Medium
Rules are the next level of measuring tool that gets used in my shop. The difference between a ruler and rule is that the rule’s zero mark is as the end of the tool. A ruler’s zero mark starts away from the edge. Rulers are fine for students to have in their pencil case, but they are not preferred in the shop. A good rule should be made from stainless steel that springs back when bent. The best rules are etched and black filled to make them easy to read, while inexpensive rules are typically lasered which can be harder to read. The rule is a vast improvement over a measuring tape because of the etched markings, its rigidity, and its ability to measure accurately from the end.
Fine
The ultimate measuring tool to my mind is the one that doesn’t use numbers at all. Using referential techniques like the story stick eliminates all math errors and makes it simple to see what is going on. For example, instead of measuring a drawer opening with a ruler, try using a small, flat stick to place against one side of the opening and make a pencil mark where the stick contacts the other end. Then do the same with the top and bottom to get the drawers width. Now you have your dimensions! It doesn’t matter if it measures 259mm or 10-3/16”, the numbers don’t matter. To create the drawer front it simply must fit in the opening.
When I build a piece, I try to dump the numbers as soon as possible. Normally once I have the carcass of the piece worked out, I switch to referential measuring and marking methods and things generally go smoothly. I have a saying that many of my students have heard before, “Numbers lead to math … math leads to mistakes … and mistakes lead to drinking.” Yes, mistakes are opportunity for learning too, but let’s face it, we all want to reduce the chance of mistakes in the shop.
 |
Clean as you go |
 |
Recipe for success |
 |
Practice, practice, practice |


