
Synopsis: A disc sander isn’t the first thing one thinks of when setting up shop, but if you get your hands on one, it may become your go-to for tasks like shaping curved parts, creating ovals and rounds, angled edges, and more. Jeff Miller has a number of clever jigs that can help make the disc sander into a tool you won’t want to live without.
I’m not sure why I bit when offered a free disc sander. It was an old cast-iron model in poor shape (I wasn’t even sure if it worked), and I had never used a disc sander before. But the allure of old iron for free proved strong, and the tool has found a home in my shop, with some great uses.
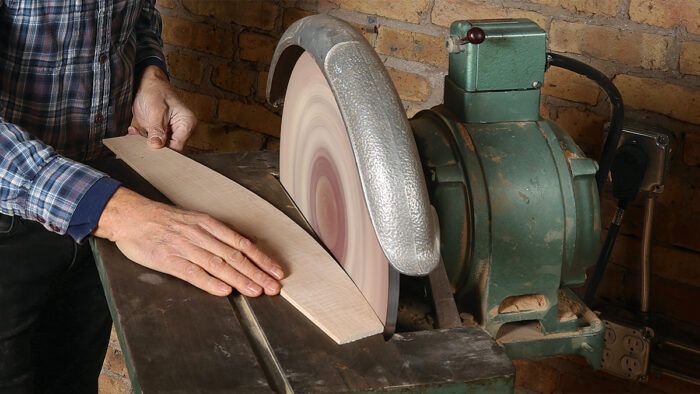
Without any added accoutrements, the disc sander is my go-to tool for freehand-shaping many small, curved parts. After bandsawing close to a layout line, I’ll work my way to it by first hitting the high spots, then sanding evenly and very lightly, in one smooth motion.
Add some shopmade jigs, and the disc sander becomes a surprisingly accurate and versatile tool for repeatably creating shapes that other machines can have trouble with.
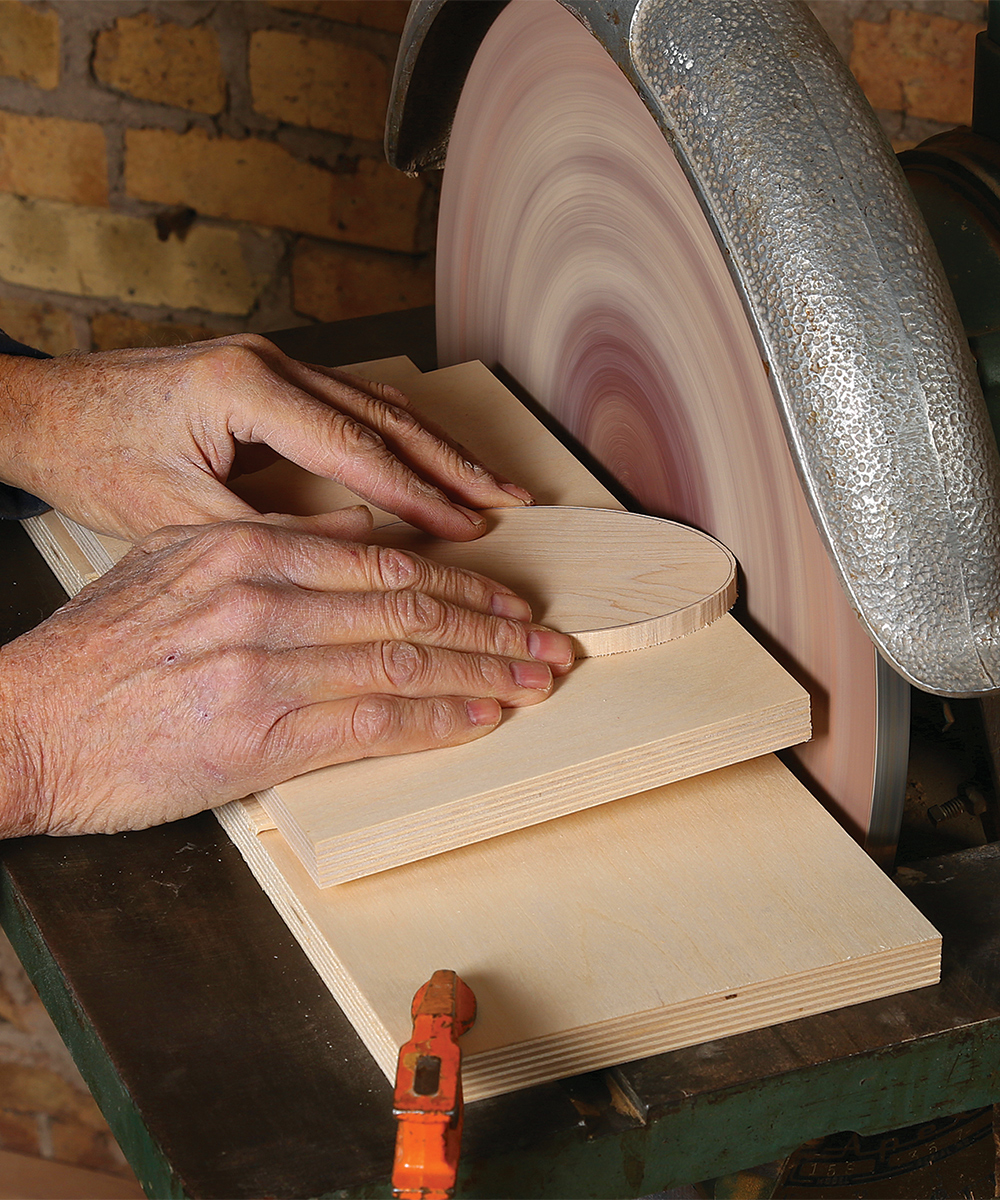
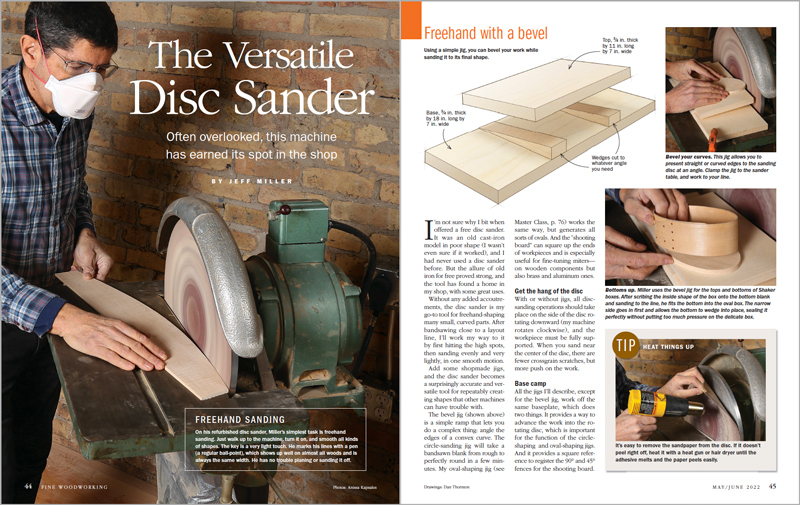
The bevel jig (shown above) is a simple ramp that lets you do a complex thing: angle the edges of a convex curve. The circle-sanding jig will take a bandsawn blank from rough to perfectly round in a few minutes. My oval-shaping jig (see Master Class) works the same way, but generates all sorts of ovals. And the “shooting board” can square up the ends of workpieces and is especially useful for fine-tuning miters— on wooden components but also brass and aluminum ones.
Get the hang of the disc
With or without jigs, all disc-sanding operations should take place on the side of the disc rotating downward (my machine rotates clockwise), and the workpiece must be fully supported. When you sand near the center of the disc, there are fewer crossgrain scratches, but more push on the work.
Base camp
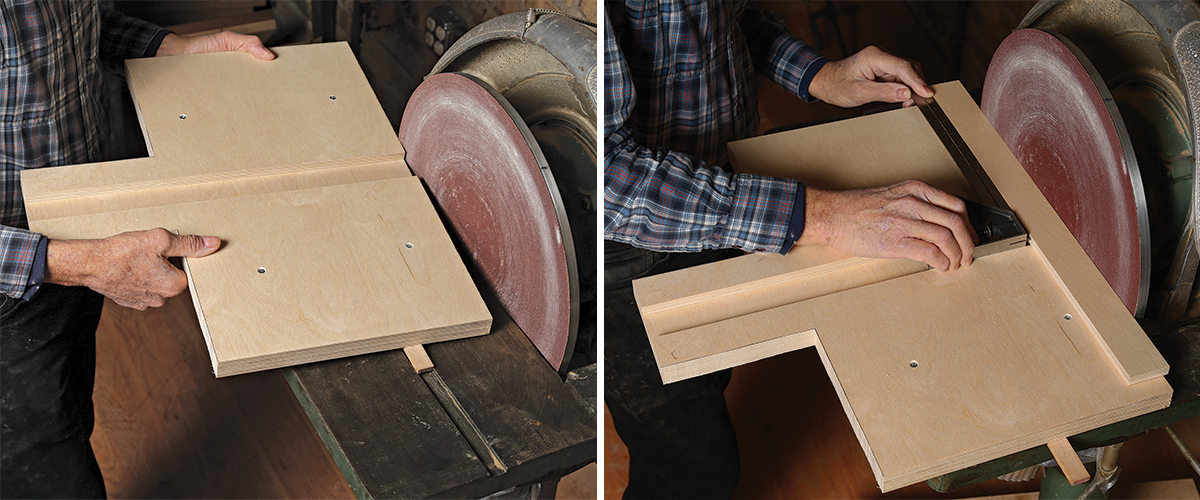
All the jigs I’ll describe, except for the bevel jig, work off the same baseplate, which does two things. It provides a way to advance the work into the rotating disc, which is important for the function of the circle-shaping and oval-shaping jigs. And it provides a square reference to register the 90° and 45° fences for the shooting board.
The base, made of two layers of 1/2-in. plywood, is T-shaped and has a slot that fits a sliding bar. The T shape is important as it allows you to hold and control the workpiece when using the shaping jigs.
The slot must be squared up accurately to the sanding disc; the process is like squaring up a crosscut sled. Start by making a runner to fit the slot in the table of your sander. Make the runner a few inches longer than the base for now. Screw one side of the runner to the base, insert the runner into the sander table, and adjust the opposite side of the runner until you’re satisfied that the slot in the jig base is perfectly square to the face of the sanding disc. Clamp the loose side of the runner to the plywood base, Lift the whole assembly out and screw the runner in place.
Sanded circles
The circle-sanding jig is based on one I made years ago to sand the edge of a large, round kitchen table. It attached to my edge sander, and proved so useful I returned to the technique over and over. My edge sander was the victim of downsizing my shop, but a run of small round tables led me to consider using my disc sander in the same way.
From Fine Woodworking #296
To view the entire article, please click the View PDF button below.
Download FREE PDF


